Section Navigation

In the series: Building A House In Unreal 4 Series
Introduction
Free to use, Unreal Engine 4 can be downloaded and installed to classroom computers as well as personal systems at no cost. With full access to the complete source code and tools, this module is a great entry point to explore the 3D media fields (such as game development, movies, television, and prototyping). Students can use their creations to create scenes, levels, or even games. This module is the introduction to Unreal Engine 4, for more information about Unreal Engine 4 please check out Unreal Engine 4 Part 2 and 3.
Learning Goals
This module will give students an introduction to what Unreal Engine 4 does and learn how to navigate their projects. Students will learn the basic interface of the Unreal Development kit, the type of projects it can be used for and review all the tools the program offers.
Vocabulary
Mesh - Another name for a 3D model. Represents the wireframe of the model which looks like a mesh(net) fabric.
Brush Mode - This is an Unreal 4 feature that uses 3D frames to create 3D surfaces within itself. This is often used for blocking out projects in the alpha and design stages.
Blocking Out - This is a stage of development and is often part of the design process as well. In 3D levels and environments, often basic shapes are placed according to a blueprint in place of finished assets. This helps get a feel for the piece and allows testing to begin in the early stages.
Volumes - In UDK a volume is a 3D space where something is happening. For example, a kill volume can be placed in water to instantly kill a player if they enter it.
Post Processing - Visual effects added to projects. For example, adding a colour correcting filter to an end product can make a desert level look washed out and bone dry if you lower saturation, making it feel more realistic.
VFX - Visual Effects. These can be added to levels, like post processing, to create a more immersive environment.
Vertex - This a point where edges meet. In a pyramid, the point on top is the vertex.
Edge - this a hard angle of a shape. In a pyramid, the edges are at the bottom that form the square base.
Face - this is the flat surface of a shape. In a pyramid, the square and 4 triangles are faces.
TARGA, .tga file - This is a file type that is used in UDK for texture files. More will be learned in a later module.
Origin Point - This is the point at which an asset’s manipulator exists. This is set in a modelling program, and can be changed in UDK for easily moving assets.
Skybox - This is a large sphere that has a special material applied to it to replicate a real sky.
Material - This is unique to a texture, where a material has instructions inside of an engine. More will be learned in a later module.
Texture - This is a base image that is created based on the UV Unwrap of a model. It is what provides the colour and look of a model. More will be learned in a later module.
Guiding Questions
- Has anyone ever wondered how video games are made?
- What is a game engine?
Curriculum Links
This module aligns with Computer Studies and the Arts curriculum. Students could also use this programme to present ideas, create media projects or learn computer programming concepts.
Materials
- A computer with at least 2GB of GDDR (Graphics RAM), 8GB of computer RAM, 3.0GHz Processor and a hard drive
- An Unreal account – Register for Unreal
Computer Activity
Video and Exploring the Software
Tutorial Overview of Unreal Engine 4
Before opening the Unreal Engine software begin by exploring what Unreal Engine is and the various parts of the software. The following video gives a brief history and overview of Unreal Engine 4.
Student Reel
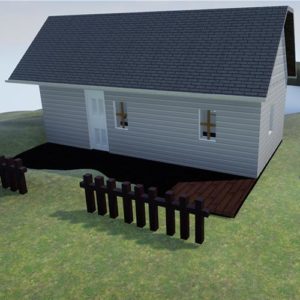
Students around the world are using Unreal Engine to bring their projects to life! Catch a glimpse of the content being created in Unreal 2017 student spotlight.
Introductory Video
There is a video included with this module set that goes in depth of the tools and techniques that are used to complete the lessons.
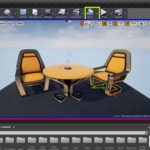
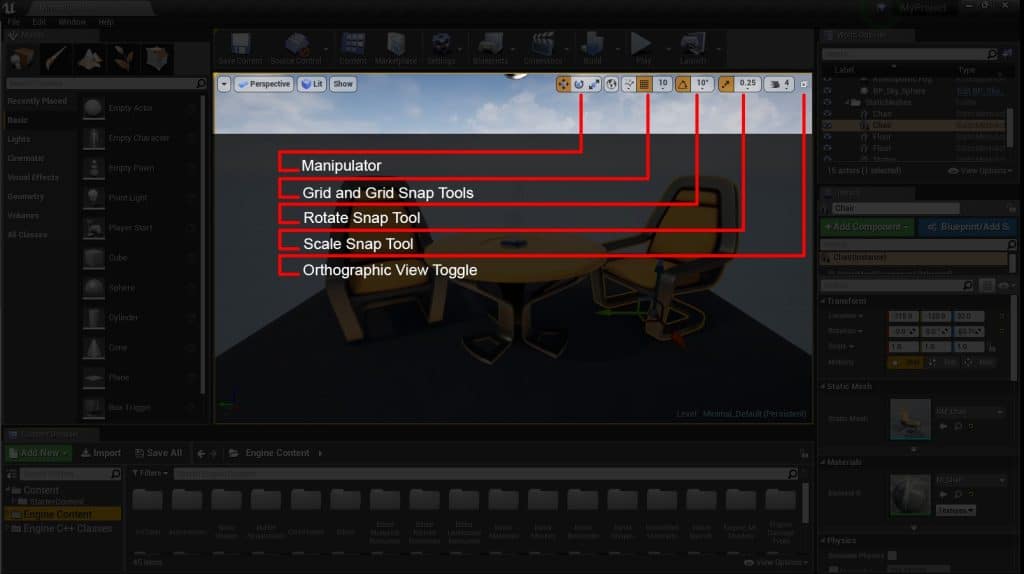
Exploring the Interface
Now that you know what Unreal can do let’s start to explore! Open Unreal on your computer and begin to explore the basic interface. There are images included with this module set that highlight the areas of the interface.
3D Space
Grids are based off of the X and Y planes. In a 3D space, there is an added portion of a grid that handles height. This grid plane is called Z.
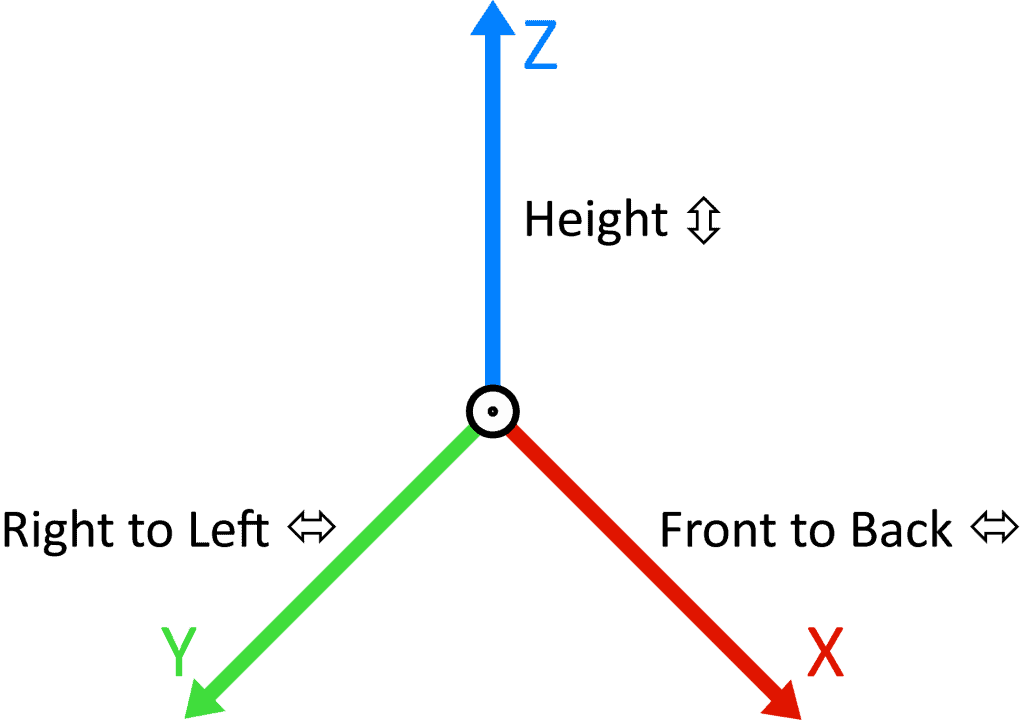
XYZ – These are grid planes that create a 3D space. X and Y is flat, and Z is height. In a lot of development programs, X is front to back, and Y is right to left, but many have this reversed as well. In Unreal Engine 4, X is right to left, and Y is front to back.
Navigation
- WASD on the keyboard to move in any direction on the XY axis
- Right click to free look in any direction, can be used in conjunction with WASD to easily navigate the scene
- Scroll wheel increases or decreases speed of movement
- Space bar cycles through manipulation options while an item is selected in the scene
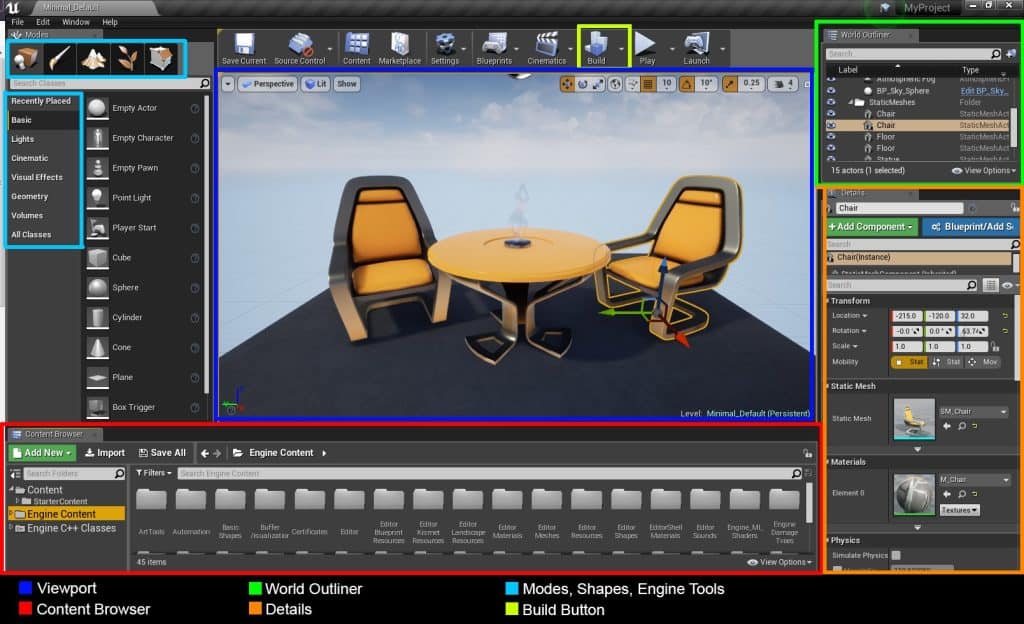
Interface
- Content Browser – Here you add your custom assets for your scene and can arrange them for the engine.
- Modes – A series of manipulation tools that allow you to flesh out your scene. You can create floors and walls using the software. You can also use it to paint textures on these creations, or you can use the landscape tool to sculpt out a natural looking area.
- Outliner – This is an overview of what exists in your scene for quick select options
- Details (controller options) – Here you can set properties of world options. Lights, fog volumes and other processing options can be controlled and set here.
Placing Assets
- Assets include models, materials, and textures.
- After adding assets to the content browser they can be dragged and dropped in to the scene and manipulated into place from there.
Placing Actors
- Actors are events that are pre-programed into Unreal 4. This includes lights, cameras, models, volumes, and triggers.
- To place actors, right click, go to “Place Actor” and select the appropriate actor.
Build
- Before a scene can be played or viewed in real time it must be built. Lighting, geometry, and various other assets that need to be compiled can all be done separately using the options.
- When approaching final builds of a scene, swapping the lighting quality is key for accurate representation. By default it is set to “Preview” lighting.
Playing
- Before you can play a level, a player start asset must be placed somewhere in the scene. Preferably where there is collision to catch the player, and where they won’t get stuck. By default, there is usually one already placed in the level. If not, by right clicking, going to “Place Actor” and selecting Player Start from the pop-up menu, one can be added.
- Hit the play button at the top of the interface and a new window will launch. By default, WASD keys are used to navigate, and you have a free camera. Press escape to stop playing.
Conclusion
With this basic foundation, it is now possible to step into the engine and begin creating with it. For more information about Unreal Engine 4 please check out Unreal Engine 4 Part 2 and Part 3.
Resources
Additional Resources
Unreal has a multitude of resources available to anyone looking to create with their engine. To learn more about this software check out some of the following educational resources.
- Their blog covers a lot of news and opportunities that have to do with the engine, sometimes covering helpful tools and tutorials.
- Their wiki includes a ton of resources for anyone using the engine.
- This is a resource for developers to ask other developers to make it easy for people to get help for their projects.
- These forums cover a ton of topics and hold a treasure trove of possibilities. Like the answers page, you can collaborate with other developers to help solve your problems or generate ideas.