
Section Navigation

Introduction
Students will learn how to write a film review. They will analyze short films by looking at the intended audience, point of view and purpose.
Learning Goals:
Students will learn how to watch films and look for cues that indicate the purpose and intended audience. In examining the purpose of the product, they will learn to identify how the purpose and its audience can impact the direction of the film.
Vocabulary:
Point of View or Perspective - the position from which something is observed
Intended Audience - a group of people for which the product is made
Guiding Questions:
- What kind of emotions have you felt while watching a movie? (Happy, sad, excited etc.)
- How do movies make you feel these emotions? What film techniques are used?
- How can you tell if a movie is for children, older kids or adults?
Curriculum Links:
Analyzing media products is a skill that links to the media arts portion of the language arts curriculum. Students will explore the films purpose and audience. Creating a review improves written communication. Students will use Flipgrid throughout to share their opinions which will also develop oral communication skills.
Materials
- Children’s story book
- Whiteboard and markers
- Projector with sound
- Devices with webcams (iPad, tablet, computer)
- Paper and pencils
- Flipgrid account
Non-Computer Activity
Read a short children’s story aloud. Discuss the book together as a group, and then work together to write a short book review. This book review will serve as an example when students are writing their own film reviews.
Questions to consider before writing the book review:
- What is the purpose of this book?
- What is the difference between the plot and the story?
- Does it teach a lesson? If so, what is the lesson?
- Who is this book intended for? (Children, adults, boys, girls, etc)
- What did you like about it? What didn’t you like?
- How did the book make you feel?
- From whose point of view is the story told? How can you tell?
The Book Review
Students then collectively write a review of the book. It will include: 1-2 sentences describing the story, 1-2 sentences describing the characters, 1-2 sentences describing the plot (no spoilers!) and a sentence stating their opinion on the story.
For fun, students can give the book a star rating.
Note: you can adjust your expectations of the book review based on the students’ abilities.
Computer Activity
As a class, watch three short films. Before watching, remind the students to think of the questions and topics they considered for the book review. . After each film, ask students to answer each of the 6 questions by doing a “Think, Pair, Share” with the person beside them. Each student will then write a film review for one of the films of their choice. . They should follow the same format demonstrated by the book review.
Activity:
Review of Questions:
Together, review the questions that students need to consider while watching the films. It may be helpful to post these somewhere in the classroom for students to reference.
- What is the purpose of this film?
- Does it teach a lesson? If so, what is the lesson?
- Who is this film intended for? (Children, adults, boys, girls, etc)
- What did you like about it? What didn’t you like?
- How did the film make you feel?
- From whose point of view is the story told from? How can you tell?
- Some of these films use no dialog or speaking. How do you know what the story is about?
- Did the film have any camera angles or sounds that helped convey the feeling of the scene?
- What emotions did the characters express? How could you tell they were feeling this way?
- What other ways could the filmmakers have portrayed the message and emotions?
It may also be beneficial to discuss what makes a good film. What do you enjoy about films? What don’t you enjoy? Think about the films you like to watch. Is there anything that they have in common? Students may want to pay attention to the way the film is shot. Do the directors use a variety of camera angles and movements? How can the movement of the camera convey the message or the feeling of the scene? How can music and sounds help convey the message or feeling?
Camera Angles
- Low Angle Shot: Shot from down low looking up towards the subject. This makes the subject look larger and more intimidating.

- High Angle Shot: Shot from a higher elevation looking down at the subject. This makes the subject look smaller and vulnerable.

- Close Up Shot: This is shot close to the subjects face and is great for showing their emotions through their facial expressions.
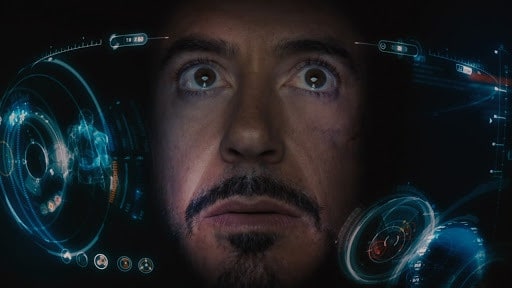
- Extreme Close Up Shot: An extreme close up usually focuses on one feature of the subject such as the tears in someones eyes.

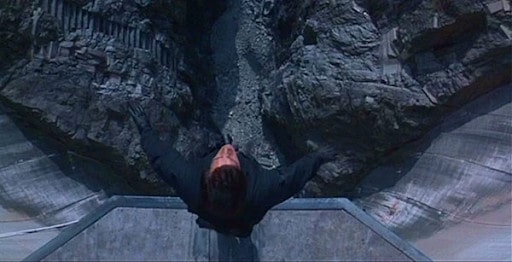
- Overhead Shot: This is shot directly above the subject looking down at them. These shots can be used to showcase complicated action scenes, show the scenery and what is going on around the subject or to show how the subject is disconnected from those around them.
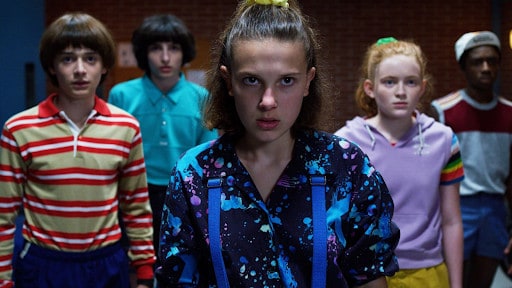
- Eye Level Shot: This is shot at the subject’s eye level. This portrays a connection to the subject and can be used to make it appear as if they are talking to you.
Setting Mood and Tone
Watch HORIZON: SESQUI’s 360 film. This film was created to celebrate Canada’s 150th anniversary of confederation. The film is done in 360 and takes place from across Canada. Pinnguaq had an opportunity to interview Drew Lightfoot the director of the film and ask questions about the production.
What are some ways that you have set the tone or mood of a film?
Mood is built from so many elements working in tandem. Music is a major factor in setting tone. If you watch the same piece of film with very different music it can evoke an entirely different emotion. The camera lensing, pace of the camera, pace of the edit, lighting and on-camera talent are all layers that come together to set the tone. If they don’t all work harmoniously then it won’t work at all.
Coming from years of work in animation I’ve come to appreciate the importance of planning. If you fail to plan, you plan to fail. Because animation takes so much time to execute, you only want to do it once.
How do you plan which camera angles you will use? Does the mood of the scene become a factor for choosing camera angles?
The camera creates the perspective of the viewer, it absolutely sets the mood – do you want the viewer to feel small, empowered, part of the action, a fly on the wall? These are all achieved by the placement of the camera.
What is the process for choosing sounds and music?
Music invokes such strong visual imagery for me. When I hear a piece of music, it moves me emotionally in one way or another – is it soft and quiet, fast and driving? They say music makes up 60% of a cinema experience and I believe every word of that statement.
What is your starting point for conveying the emotion of a scene?
Trying to create an emotional connection to the picture is key. Whether it be moving, scary, evocative, you try to break it down. How should this visual make me feel? What is the setting? What time of day is it? Who’s there? Why are they there? What are they reacting to?
With your experience on Sesqui I was also wondering how shooting something in 360 changed the planning process? What was different about filming in 360?
360 filmmaking pushes you to re-invent the wheel – you essentially throw away everything you’ve learned. There are no close-ups, no mediums, no wides. You see everything in every direction at all times. You can place the camera closer to the subject but you’re still going to see the entire world in which they dwell. You can move the camera, put it amongst a crowd, put it underwater but you have to always be thinking of where you want the viewer to look. You have to guide them. With a regular camera you frame out everything you don’t want to see to focus on what’s important. In 360 you have to plan the action so the viewer stays with it, following it around the screen.
For Horizon we had the luxury of editing in a small dome so we could preview scenes and make real-time changes as we were going.
The platform on which the film will display is also a factor. Horizon was designed for a dome where the audience is free to look around in 360 – for a VR headset, the viewer only sees a small portion of the ‘dome’
Since the video is of everything all around did that change the types of angles you could use? I love how there was still a lot of movement within the film. What was the process for planning the movement?
Framing for 360 you really have to be selective. On a typical shoot, you find one angle and everything outside the frame doesn’t matter. For 360 you have to find a position that works in every possible angle. You have to be able to hide the crew, highways, powerlines, anything you don’t want in frame. On Horizon, we were always looking for trees, rocks or other structures to hide ourselves behind. I had a remote viewing headset so I could see the camera view from 50 feet away.
Scouting was a major undertaking. I would pinpoint exactly where each camera would go long before we shot. For economy or to catch the perfect time at sunset, we often film from several angles at once so I was constantly looking for creative ways to hide the cameras from each other.
Camera movement brings the audience along for the journey, wherever possible I would look for opportunities to mount the camera to vehicles, dogs sled, helicopters or remote-controlled cars.
It was one of the most challenging film making experiences of my career but also one of the most rewarding.
Viewing the Films
Below are three short films that could be used in your lesson. Always prescreen videos before showing them to your class to ensure the content is age-appropriate and acceptable for your students. All of the short films below relate to space. For a space-related animation activity, please visit the “Trip to the Moon” lesson.
After each film, have students do a “Think, Pair, Share” with the person beside them. Each pair will spend two minutes discussing their answers to the questions above. students can volunteer to share their thoughts with the class. After all three short films have been viewed and discussed, students can begin writing their reviews.
How to Use Flipgrid
Before you start your lesson create a teacher Flipgrid account. Once you have made an account you will need to make a “grid” for your class. It is best to have a grid for each of your classes.
- Click “Add New Grid” once you have logged into your account

2. Enter the information for your grid. Put in a name for your grid that will make it easy to tell which class it is for. Selecting the grid type is important as it will determine how your students enter the grid.
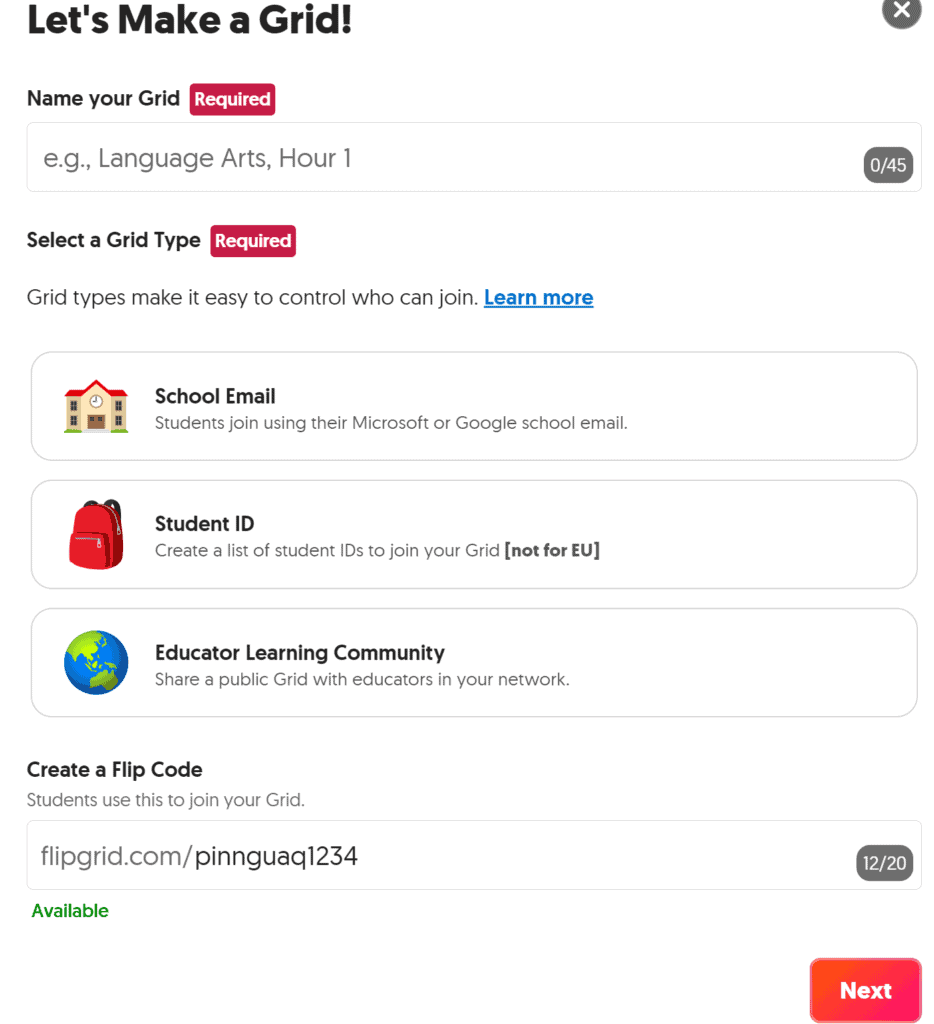
School Email – with this option you can enter the end part of your school email account. This will give access to anyone with that email ending.
Student ID – this type of grid allows students to enter with a code number or a QR code.
Educator Learning Community – this option is best for a group of adults who may not have an email with the same ending. Anyone will be able to enter by entering the Flip Code and verifying their email.
The Flip Code will be the way students enter the grid and it can be customized for your class.
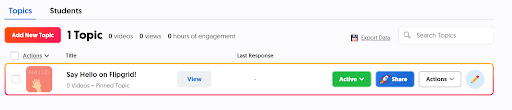
3. After creating your grid you can click on it to add a topic for students to post about.

4. To add a new topic click the “Add New Topic” button. Topics can be anything from conversation prompts to assignments.
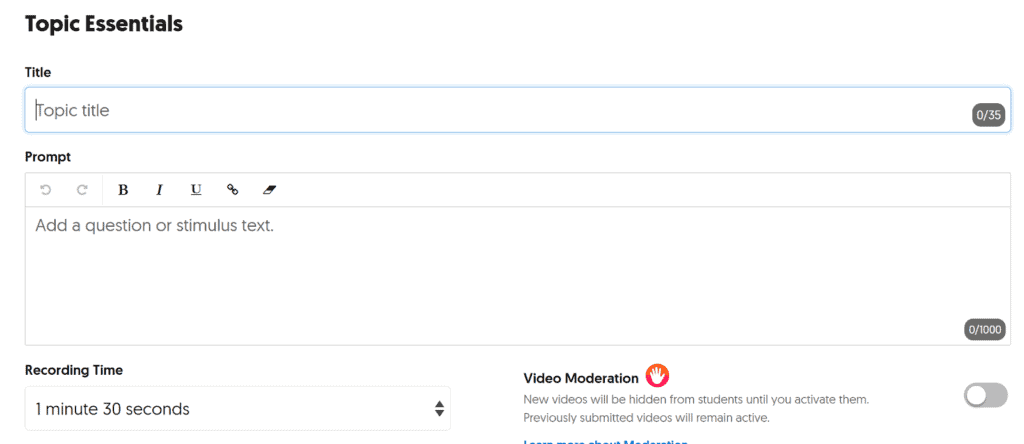
5. When adding a new topic you can choose a topic and add a prompt. Flipgrid also allows you to control the maximum recording time that students are allowed to use. You can also choose to moderate your students videos if you are worried that they will post something inappropriate.
6. Students will add their responses to your topic. From this screen they will need to give access to their camera and microphone.
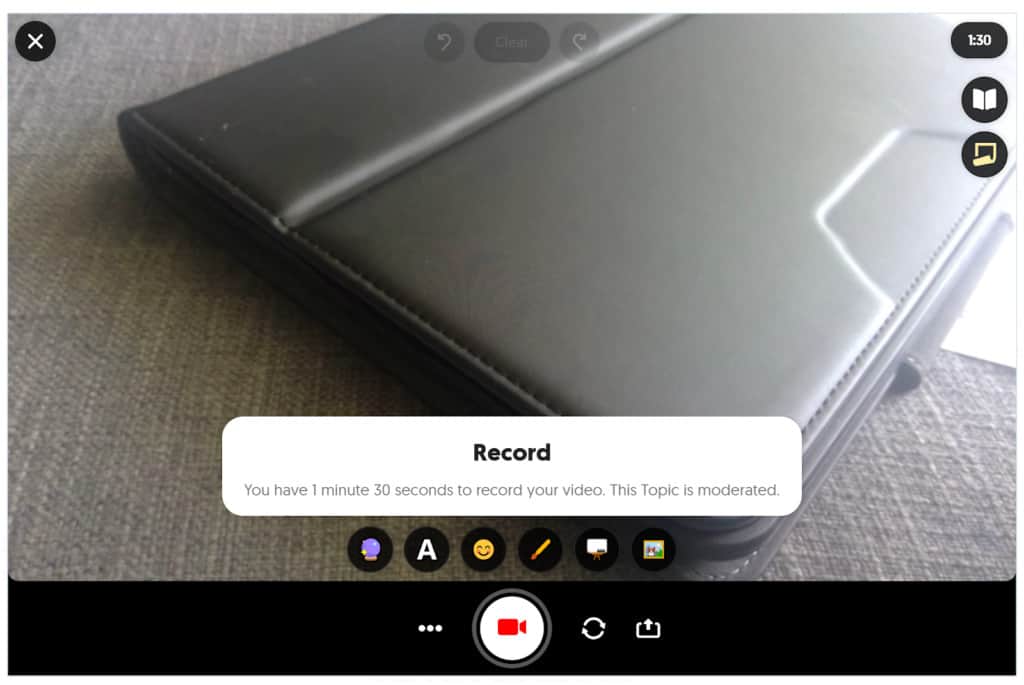
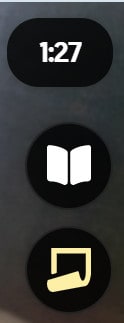
Once students hit record the time in the top right will start counting done so they know how much time they have left.
Students can click on the open book icon if they would like to see the topic and any instructions given.
The sticky note icon allows students to add notes to their screen that they can remove before posting their video. This is good for listing things they want to mention in their video.
7. To add filters, stickers or notes students can use the icons across the bottom of the screen. When they are done recording click next. This will take them to a preview screen. If they want to they can go back and add more or restart. If they are happy with their recording they can hit next again.
8. The last step before posting is to take a picture or a selfie to post with their video. Once the picture has been selected they will be taken to a screen where they can add their name and title for their video.
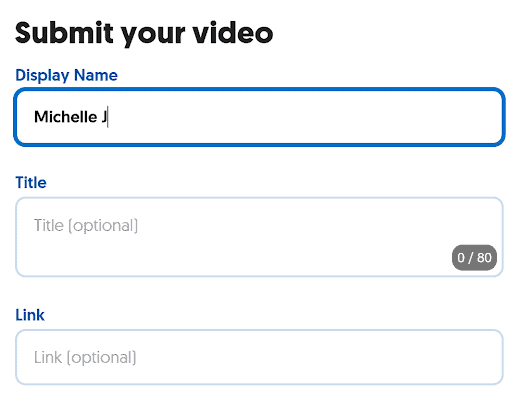
Writing the Film Review
Students will each pick one of the three films to review on Flipgrid. Before students start recording their reviews have them write down the points they want to mention in their review. They should think about the questions addressed earlier. It might be helpful for students to write out their review in the same format as the book review and use this as a script. . For additional fun students can give the film a star rating.
Modifications for Older Students
To make this activity more appropriate for older students have them choose a short video based on a poem from Motion Poems. Have students read the poem first and think of how they would represent it in a video. Students can analyze the poems by considering the theme, mood and structure of the poem. After thinking about the poem and considering what they think the video would look like they can watch the film and examine it. How does the video relate to the content in the poem? Is the video what you expected? Does the video portray the mood and theme of the poem?
Conclusion
Have a class discussion about the intended audience for each film. How would you change the film to target it for a different audience? Would a lot need to be changed to adapt it for a different demographic?
When taking information from the media we need to also consider any bias the creators may have. This is prevalent when getting political information from the news. Different news channels tend to have different political views and may shift information based on their views. As consumers we need to think about who the intended audience is as well as possible bias. What are some strategies we can use to get unbiased information? Other than politics, what other ways can media sources be biased?
Extension Activities
Students can choose to write reviews of the books they read throughout the school year. This will help their classmates determine if the book is one they would be interested in reading.
Have students create their own animations and have their peers create a review on Flipgrid. Students can make their own animations in GraphicsGale. Try Pinnguaq’s lesson on Animation Basics.
Resources
- Jen Giffer @VirtualGiff on twitter is a Flipgrid supporter. She has presented Flipgrid at conferences and has created posts about using it in the classroom.
- Scholastic, for a lesson on writing movie reviews that is part of a larger unit.
- My English Pages. For a detailed list of things to consider and write about when creating a book or film review.
- Inhabit Media. Nunavut-based publishing company that hasstories for children that could be appropriate for the non-computer activity.
- Wolfcrow review of 15 essential camera shots and how they are used in films.
- One Take by Sheepolution is a game where students can practice running a camera for a long shot.
- Master Class has a lesson on poem analysis in 10 steps.
- Behind the Scenes of SESQUI can be viewed on youtube.
You might also like
Understanding The Importance Of Oral Stories
 Grade 5 – Grade 9
The goal for this lesson is to teach students the important of inter generational oral stories and Indigenous culture.

Creating Positive User Experiences When Introducing Players To Your Game
Grade 11 – Grade 12
How can you create a positive user experience for players when introducing them to your game? It is more complicated than you think! Find out more in this lesson.

Podcasting
Grade 4 – Grade 8
Do you listen to podcasts? Or maybe you don’t know what a podcasting is. Find out more in this lesson as Michelle Jilesen teaches us how to create a podcast of our own.
