Section Navigation

Introduction
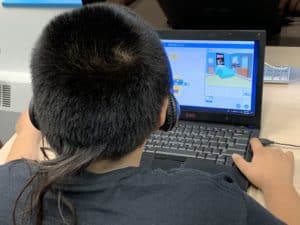
Students will be learning how to tell jokes using the resources available on Scratch. They will be exploring their sense of humor and sharing their jokes with their peers. Students will have the opportunity to add to their jokes by choosing appropriate sprites and animating them.
We want to thank Jaime Fortin who acted as the Cultural Advisor for this module. Jaime is a student at Trent University working on a degree in Indigenous Studies. She is from Chapleau Cree First Nation, a small reserve in northern Ontario.
Learning Goals
By the end of this module students will be able to animate characters and use ‘wait blocks’ to time the characters speaking. They will also explore the ‘looks’ section in Scratch.
Vocabulary
Animation - Changing pictures quickly to make it appear that there is movement
Event - Something a program can react to, such as a key being pressed
Loop - Part of a program that is repeated
Guiding Questions
- Do you have a favorite joke? What do you like about it?
- What makes a joke funny?
- What is the difference between a joke and being mean and teasing someone? (Use this question to talk about how making fun of someone’s experience, culture, religion or appearance should never be considered a joke)
Curriculum Links
This module provides an opportunity to address curriculum expectations in the K-3, Language Arts, Computer Studies and Arts curriculum. To tell a joke students need to have good communication skills. Students will apply and share their ideas, perspectives and creative thoughts through creating and animating jokes in Scratch.
Materials
- Scratch – Download Scratch
- Adobe AIR (required for Scratch to run) – Download Adobe AIR
- Paper and pencils
Non-Computer Activity
Introduce this module by sharing a few jokes. This Red Tricycle blog post is a great resource for jokes geared for kids. Have the students do a think, pair, share with jokes (think-pair-share is a collaborative teaching strategy first proposed by Frank Lyman. In think-pair-share strategy the teacher acts as a facilitator, and pose the question to the students. The students are given sufficient time to think and gather their thoughts, after which the teacher asks them to pair themselves and share their thoughts with each other).
This will give the class a starting point for jokes they can put into Scratch to create an animation. Have each student write down a joke they wish to program. This is a good chance to explain to students that as an oral society often times Indigenous Peoples told their jokes through storytelling. Sometimes the jokes are not as obvious as a knock knock joke but are more hidden within the story being told. This explains the importance of humor in Indigenous cultures.
Another non-computer introduction activity for older students could include reading traditional Indigenous Stories. This website shares some oral stories teachers could print and allow students to consider which part of the story they think are funny. Alternatively, teachers could read the story to the class and have students pick out the funny parts.
Computer Activity
Have the students tell their joke(s) digitally through Scratch. They will be able to choose backdrops and characters to make their jokes visually appealing and add humour. Students will be using events, control, motion and look sections on Scratch to animate their jokes.
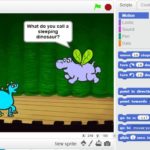
Example:

Activity
- Start a new project and delete the cat.
- Select a background for your joke. To pick backdrops from the library click the background icon on the left of the screen below new backdrop.
- To add sprites from the library click the character icon beside new sprite. You can choose which sprites you want to add. Do not add more than 4 sprites.
- Click on the character that is going to speak first. Add a “when flag click” block from the events section to start.
- Go to the looks section and add a “say” block. Within the “say” block add the first line of your joke.
- Depending on the length of the first line of the joke another say block may need to be used.
- Click on the sprite that is going to respond to the joke. Add a “when flag click” block.
- A wait block will need to be added to have the sprite wait for the first line of the joke to be told.
- Add a “say” block to have the sprite respond to the first line of the joke.
- Adjust the time in the wait block until you are happy with the timing.
- Click on the joke telling sprite. Add a wait block and then a “say” block to say the punchline of the joke.
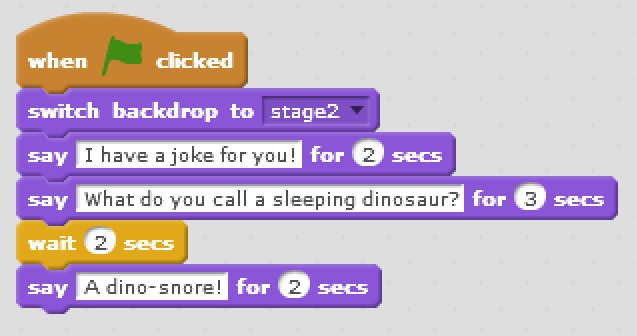
- The other sprite can respond to the joke or laugh using a wait block followed by a “say” block.
- Test the program and adjust times on the wait blocks until the timing is satisfactory.
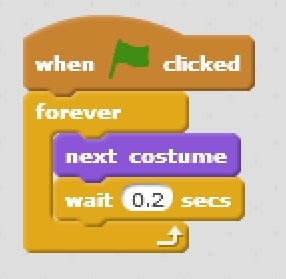
- If the sprites you have chosen have more than one costume they can be animated.
- Add another “when flag clicked” block to your workspace.
- A forever loop is added next and found in the control section in Scratch.
- Add a “next costume” block found in the looks section.
- If the program is played now the costumes are changing really fast and it does not look good. Add a wait block to slow down the costume changes.]
- To change the background during your joke choose another backdrop from the library.
- Add the “switch to backdrop” block to the start of one of the scripts to set the starting backdrop.
- Add the “switch to backdrop” block where you want the backdrop switch to occur.
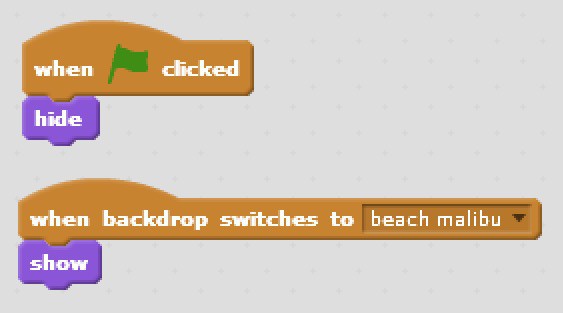
- To have a sprite hide and show up after the backdrop has been changed start with a “when flag clicked” button.
- In the looks section of Scratch a “hide” block can be found and added to the script. This will have the sprite hide when the joke starts.
- The events section in Scratch has a block for when the backdrop is switched. This is going to be the start of our next script.
- Next we can add a “show” block from the looks section. This has the sprite show itself when the backdrop is changed.
Conclusion
Students can share their digital jokes with two friends and then sit in a circle for a class discussion. As a group, talk about what makes a joke funny. What did they like about each others jokes? What extra things were you able to add to your joke in Scratch? This could also be a good time to continue the discussion about the difference between telling jokes and teasing friends and why this is important to know the difference.
Resources
- The Kids Health website has an article talking about the importance of having a sense of humour and how children benefit from having a sense of humour.
- The Conversation website has an article that talks about kids telling jokes and how it links to language, imagination, perspective and the concept of deception.
- A website on the importance of humour in Indigenous communities.
- These Indigenous comedians aren’t just funny, they’re using humour to tackle social problems, combat racism and start difficult conversations.
- This article explains how jokes are intertwined into oral traditions.
- PDF Document – The Learning Circle Classroom Activities on First Nations in Canada (PDF)
You might also like
Creating A Short Story Animation In Scratch
 Grade 1 – Grade 3
Students will learn how to create a short folktale animation while also learning programming skills and build upon their knowledge of algorithms.
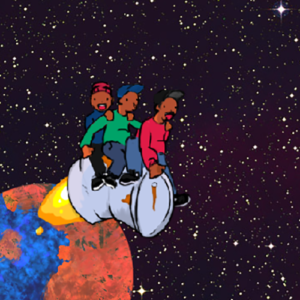
Introduction To Animation And Movement In Scratch
Grade 3 – Grade 6
Based on a book called “Trip to the Moon”, students will learn the basics of animation and sprite movement in Scratch using trip to the moon.
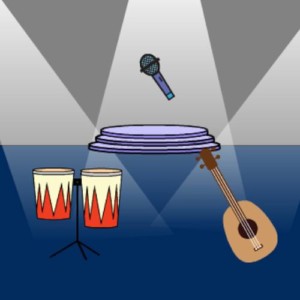
Creating A Theme Song In Scratch
Grade 1 – Grade 3
In this lesson students will explore Scratch’s music library, and putting them together through programming to make music.
