Section Navigation

Introduction
Students will learn how to retouch photos using GIMP. Specifically they will learn ways to fix old and damaged photos, remove “red eyes” and touch up skin imperfections. They will also explore the importance of images in history and how they can help us infer information about the past.
Learning Goals
By the end of this module students will know how to use the tools in GIMP to retouch and edit photos. They will also learn the importance of images in history and how we can learn from them.
Vocabulary
Inference - a conclusion made based on evidence and reasoning.
Clone tool - a function in photo-editing software that duplicates a portion of the image using part of the image as a source.
Heal tool - a function in photo-editing software that uses the pixels around a source point to blend and remove unwanted details in an image.
Guiding Questions
Do you or your family have old, damaged photos that you would like to restore? Have you ever been able to tell what happened in the past based on an image?
Curriculum Links
This module can be connected to the Art and Technology curriculum. Students will gain computer skills and the ability to manipulate images. It can also be tied to English and History lessons as students learn ways of inferring information about the past by looking closely at images.
Materials
- GIMP – Download GIMP
- Projector
- Pen and paper
Non-Computer Activity
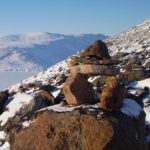
Show this image to your students and ask the following questions.

- What information can we take from this image?
- When do you think the photo was taken?
- Where do you think the photo was taken?
- What do you think the situation is?
- How do the people in the image look? Do their expressions reveal any information about what was happening?
- How do we know this information?
This image shows soldiers in trenches in the first World War. We know from history that the battles took place in Europe. But is there anything distinctive about their outfits, or any other details in their surroundings that could hint at a more specific location? Their expressions are mostly grim, which is understandable given the terrible situation they were in. When looking at historical images, you can cross-reference with facts from books and other sources. Think of yourself as a detective looking for clues.
Talk about what an inference is. An inference is coming to a conclusion based on something else that is true, or appears to be true. Inferences can be accurate or inaccurate, logical or illogical, justified or unjustified. To avoid “jumping to conclusions” you need to recruit your critical thinking skills to look at the facts objectively.
Historical images can be used to learn more about the past; they are very important for gaining a greater understanding of what life, people, and places were like at a specific point in time. Discuss the reliability of images from the past. Talk about photographer bias, and how photos can be paired with headlines and text to convey a particular story. It is important to view a photo for what it is, a snapshot of a specific moment in time. You can’t see what is beyond the frame, or what happened moments before, or moments after. Photos tell a story, but they don’t always tell the full story.
Make inferences about the following images. After students have had the chance to examine the photos, read the caption to them. Links to the sites where the images were found can also be explored for additional information.
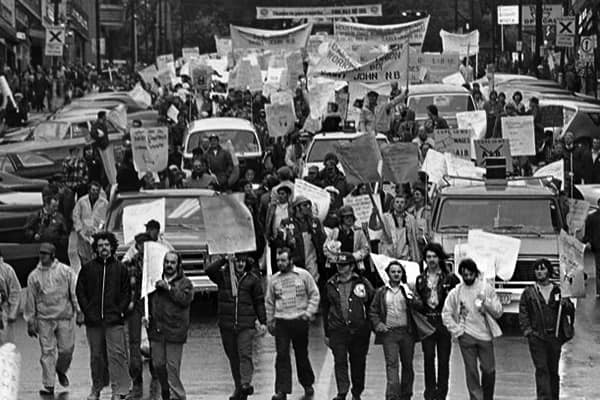
This image is from the largest labour protest in Canadian History. On October 14, 1976 over a million workers walked off the job across Canada as a part of a general strike called by the Canadian Labour Congress to protest the federal government’s plans to impose a wage and price control legislation.
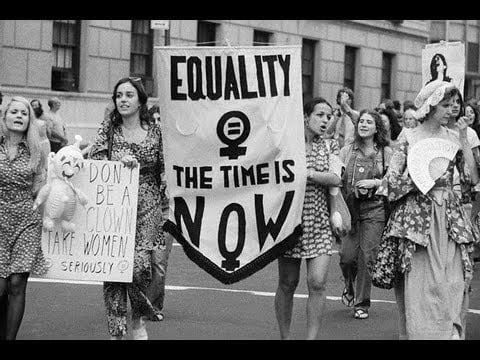
This is from the 1960s and 70s when women were fighting for various rights. The women’s liberation movement became a forum for issues of feminist history, reproductive choice, class and work. Feminist academics and activists participated in this movement.
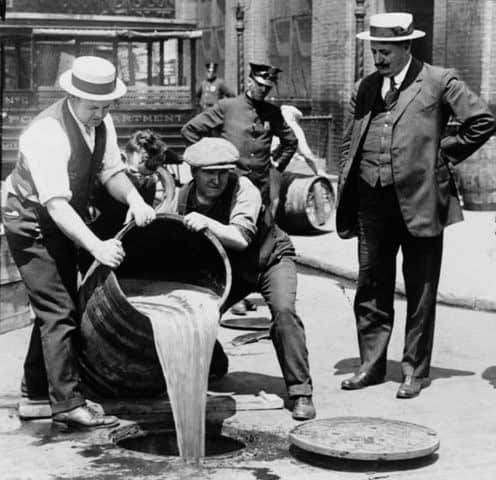
This image is from 1918 when Prohibition was in effect. Prohibition is the restriction of the production, sale, transportation, importation and exportation of alcoholic beverages. This was intended to reduce the amount of intoxicated employees, but lead to bootleggers and rum runners. In this image alcohol is being dumped into the sewer.
Computer Activity
Students can use an image they have taken or find one online to open in GIMP. The image should contain things that the students wants to fix or edit such as fold marks, tears, and aesthetic details such as bags under eyes, red eyes, blemishes, etc.
Getting Started
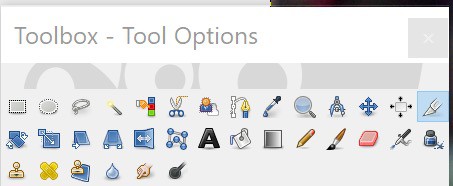
Open GIMP and from the top menu, select File > ,Open and select the image you would like to modify. To zoom and adjust the view, use the number keys 1 through 5. Additionally, select View from the top menu to access more zoom options such as ‘fit image in window’. If the toolbox is not visible, show it by selecting Tools > Toolbox or pressing Ctrl+B.
Cropping
To crop an image select the crop tool in the toolbox (the blade or knife tip icon). Drag over your image to select the area you want to keep, then press the ‘enter’ key. The ruler across the top and side of the page is in pixels and shows you the size of your image.
Resizing
Resizing an image is different from cropping. Cropping removes parts of an image, whereas resizing adjusts the dimensions of the image to be larger or smaller. To resize your image select Image > Scale Image from the top menu. This opens a dialogue box where new width and height values can be entered. The default measurement is pixels, but different units can be selected from the drop-down menu. Once you have made your adjustments select ‘Scale’. NOTE: Making a low-resolution image larger does not increase the resolution, simply the dimensions. You can enlarge a low resolution image to a certain point without it looking different, but at a certain it will start to look “fuzzy”.
Layers
Layers are very helpful for organizing your file, and any edits or additions you make. Keeping each addition or change as a separate layer allows you to edit that layer without affecting the layers above or beneath it. By default, any text you add will appear as its own layer.
If the ‘Layers’ menu is not visible, show it by clicking Windows > Recently Closed Docks > Layers, Channels, Paths….
Layers can be added by right-clicking under the list of current layers and selecting ‘new layer’ or by selecting Layers > New Layer. In the dialogue that appears, you can name the layer and make other adjustments. The default settings for size and transparency will typically be appropriate.
To colour a layer, add a new layer, select the ‘bucket fill’ tool, choose a colour and click on the workspace to fill the new layer with colour. At first the layer will be opaque, but the opacity can be adjusted by sliding the opacity bar until you are satisfied with how it looks.
Clone Tool
The Clone tool(rubber stamp icon) is a unique tool that allows you to copy an area of the image to somewhere else in your image. Hold the ‘control’ key and click the source to copy from then release the control key. Now click and drag over any areas you want replaced or covered by the source area. This tool is helpful to duplicate part of an image, or to remove parts of an image.
Heal Tool
The Heal tool (two crossed bandaids icon), works similar to the clone tool by using a source point to copy pixels to another part of your image. This function is great for fixing “imperfections” in your image such as skin blemishes or wrinkles. The Heal tool does not completely copy the source image like the clone tool. Instead it takes into consideration the area around where it is being applied. This helps give the end product a smooth and consistent look
Filters
There are filters built into GIMP that can be applied to images to yield a variety of effects. To apply a filter select Filters from the top menu and choose from the various filters which are sorted into categories based on what they do. To find out what a filter does, apply it and play around with the settings. If you do not like the result, simply undo the action.
Red Eyes
To remove red eyes from an image, first zoom in on the eye. Use the Ellipse Select tool to select the red portion of the eye. Drag the corners to adjust the selection until all of the red is selected. From the top menu select Colors > Hue-Saturation… to open the window where the saturation and lightness can be adjusted. Reduce the saturation and lightness by moving the sliders to the left until the redness is gone. If you want the pupils darker, repeat the process again.
Lighten Teeth
To make teeth whiter, use the Free Select tool with the feathered edges feature selected to select the teeth. Be careful not to select the gums, tongue or lips. Once you have selected the teeth select Colors > Hue-Saturation… and increase the lightness and reduce the saturation until you get the result you like. With aesthetic changes like these, start with subtle adjustments, to ensure your image still appears natural.
Skin Blemishes
To fix skin blemishes use the Clone and Heal tools. As you will be adjusting small areas, it is best to only click instead of clicking and dragging in this situation. Clicking allows you to make single, small adjustments which can easily be undone if you are not satisfied with how it looks. Make sure to change the source point frequently so that all of your adjustments don’t come from the same source. This will help achieve a more natural effect.
Damaged Photos
Physical photographs frequently get damaged over time from being stored and handled, and also fade with age. The tools in GIMP allow us to restore many of these negative effects. Fold marks, chips or tears can be filled in with the Clone and Heal tools. If a photo is faded, the Hue and Saturation can be adjusted. The colours can also be adjusted to brighten or darken part of the image.
Saving
The default file format for GIMP files is an .XCF file (short for eXperimantal Computing Facility). It maintains all layers, channels, paths, guides, etc, and is helpful for editing the file at a future date. Otherwise, to share your file with those who do not have GIMP, export as a .JPEG or .PNG. Go to File > Export As… to open a window where you can enter a filename, select a destination to save the file, and the format. Choose the quality after clicking ‘Export’. If your image as a transparent background, export as a .PNG as transparency is not supported in JPEG files.
Conclusion
Find a historical image related to the current unit of study. Remember to cite the source of the image. Write a paragraph about what you think is happening in the image and explain the reasoning behind your inferences. What questions can you come up with from the image? Write a paragraph explaining the importance of photographs to history and how we can gain valuable and unbiased information from them.
Resources
- World Label has a blog post about GIMP which includes some great resources for editing photos.
- Perspectives on History has an article that examines using images from history textbooks instead of just reading for lessons.
- Davies Media Design (PowerPoint) offers a tutorial on how to edit damaged photos in GIMP and demonstrates some of the key concepts.
Some references that talk about bias in photography (relates to modern imagery more than historical imagery, but important to think about):
- Bias in Photography
- Media Bias (not appropriate for younger grades; teacher to use judgement if this is helpful or not)
- Bias and Photojournalism (again, there is some content that may not be appropriate for younger grades, but the point is that “just as news photographs and video can significantly help to tell a story, they can also mislead readers and undermine the true facts of an event”)
