
Introduction
- The tutorial builds upon previous pixel art curriculum and provides a summation of skills presented in those activities.
- This tutorial covers the use of GraphicsGale to create an animated sprite for use in game development in Scratch.
- Scratch can support animated GIF images, which will instantly convert the frames of the GIF into separate “costumes.”
Vocabulary
- Anti-Aliasing: Using a pixel of an intermediate value to soften the contrast between two adjacent pixels.
- Selout: Selective outlining, or selout, is the process of replacing a stark black outline, or parts of that line, with colours contained within a sprite’s palette. This softens the outline and helps define the form of the sprite.
- Walk Cycle: A series of frames of animation, used to represent a character walking.
- Costume: The term used by the program Scratch, to represent individual frames or states of a sprite.
- Save As: Saving a file in a format different to the default file type supported by the creating software.
Materials
Video Tutorial
Computer Activity
Setup
- Open GraphicsGale and create a new document by clicking the New Document button in the top left of the toolbar or by pressing CTRL+N

- In the New Document dialogue box that pops up, set the size to 32x32px, and the Colour Depth to 8-Bit(256 Colours), then click OK

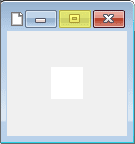
- Maximize your canvas by clicking the maximize button, then resize the canvas to 2000% using the drop-down magnification menu in the toolbar

- Turn on the pixel grid (as needed) by clicking the grid button to the right of the magnification menu in the toolbar (click again to turn it off)

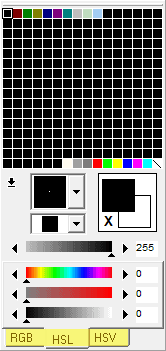
Establishing a Palette
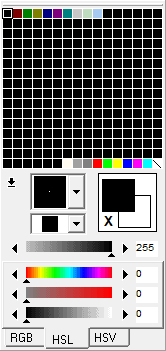
- Set a palette of up to 15 colours (15+1 transparent colours will work easily with most game engines, and be easy to track when animating)
- Set palette colours in the Indexed Palette on the right Palette panel by left-clicking an unused palette swatch (square), then use the HSV (Hue, Saturation, Value) sliders below the palette to adjust the colour swatch
- To save time, you can draw out small blocks of colour on the edge of your canvas with the Pen tool, which will allow you to right-click and select colours while you work

- To copy a colour in the palette, left-click while holding CTRL, and drag that swatch to a new unused swatch in the palette
- Copying swatch colours can allow you to quickly set up colour ramps, selections of a base tone, shades, and highlights
Drawing Your Sprite
- Once your palette has been set, block out the forms of your sprite using the Pen tool
- To erase, right-click the background colour to select it and draw background over the unwanted pixels
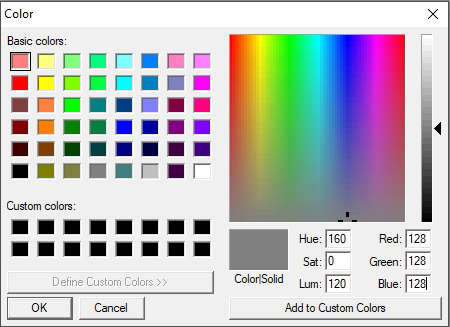
- To help with contrast and visibility, since sprites are often drawn on multiple backgrounds, set your background colour to a 50% grey (RGB 128/128/128)
- Use the tabs on the sliders below the Palette to switch between RGB/HSL/HSV to choose the colour mode you are most comfortable with.
- When your sprite is complete, assess the contrast and strength of your colours
- To adjust colours, right-click to select them on the canvas and this will highlight the corresponding swatch on the palette
- Any changes made to an active palette swatch will carry over to those same colours on the canvas
Clean-Up & Duplicate
- Remove any on-canvas swatches by drawing over them with the background colour
- To make a walk cycle, we’ll need a series of frames showing the sprite moving. To keep things simple, we’ll start with a basic four-frame walk cycle. This cycle consists of two idle frames (the base character sprite standing) and two action frames (one with right leg/left arm forwards, one with left leg/right arm forward).
- To duplicate your frame, navigate to the Duplicate button on the Animation toolbar, beneath the main toolbar at the top of the screen. The left-click Duplicate, then click OK in the Frame properties dialogue that pops up.
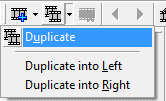
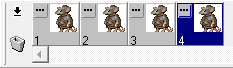
- Repeat the duplication process two more times, until you have four frames visible in the timeline at the bottom of the screen.
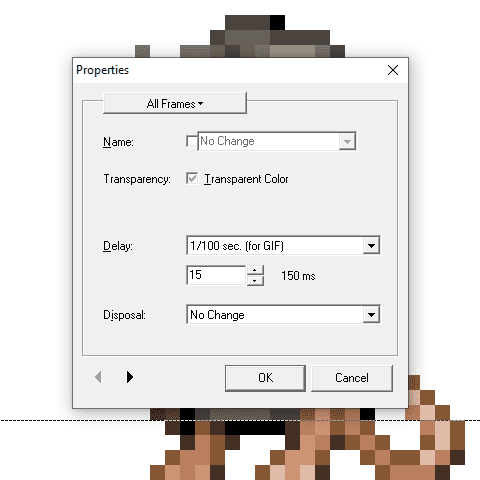
- Click the “…” button on any frame in the timeline to open the Frame Properties window. Select “All Frames” from the topmost dropdown menu, then ensure Transparent Color is checked. You can click the colour swatch to open a preview of the active frame, then use the eyedropper tool to choose the background colour in the frame. A dropdown menu at the bottom can resize the canvas image if it is too small to accurately pick your colour.
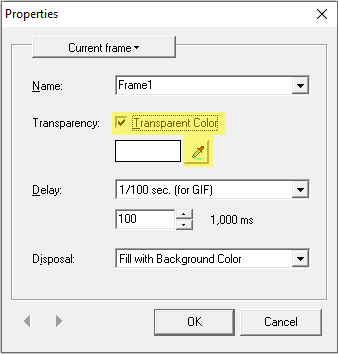
- Now your sprites will have the background canvas removed in their final output form.
Create Your Walk Cycle
- Left-click Frame 2 in the timeline to select it as the active frame. This will be your first frame of motion.

- Redraw the sprite to show your character stepping forward with one foot and the opposite arm (or whatever appendages they might have).
- You can right-click and drag to create a selection, then left-click and drag inside of that selection to shift components of your sprite. Right-click outside of the selection area to set it in place and deselect it.
- You can use the Back Frame/Forward Frame buttons in the Animation toolbar to switch quickly between frames and evaluate the differences in position and other changes in your frames

- Once Frame 2 is complete, select Frame 4 from the Timeline by left-clicking it. You now want to draw the second motion frame, to show the character sprite stepping forward with the opposite appendages shown in Frame 2.
Adjust Your Timing & Resample
- Left-click the “…” button on any frame in the Timeline to open the Frame Properties menu. Select “All Frames” from the top dropdown menu to apply changes to all four frames.
- Click the “Delay” dropdown menu and select 1/100 sec (for GIF). Use the value field below to enter the timing in milliseconds that each frame should be displayed. I have set mine to 15 (or 150 ms). Click OK to apply the timing to all frames.
- You can use the Play button in the Animation toolbar to preview the timing of your animation in the preview panel.

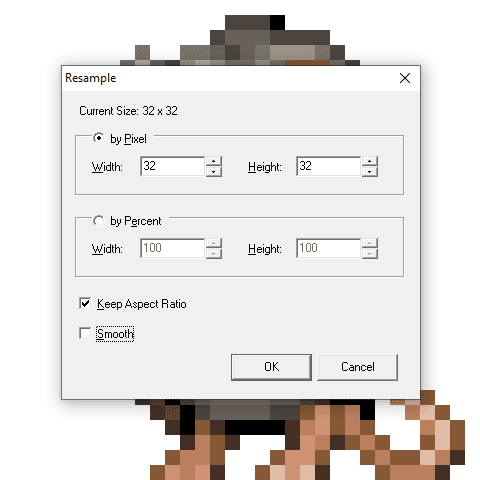
- 32×32 px, the current size of the sprite, is likely going to be too small for easy use in Scratch, but it’s easy to resize all frames in one simple action. Navigate to All Frames>Resample. In the Resample popup, uncheck “Smooth,” then enter the pixel dimensions or percentage you want to change the size to. In this case, try 64×64 px. Then click OK.
- Once you’re happy with the speed and size of your animation, it’s time to save it in a format that will be easy for Scratch to use. Navigate to File>Save As. In the Save As dialogue, enter a filename and location for your sprite, then use the dropdown menu under “Save as type:” Select GIF (*.gif) from the list and click Save.
Adding Your Sprite to Scratch
- Open a new project in Scratch. Delete the base cat sprite by clicking the trash icon in the upper left corner of the Sprite icon.
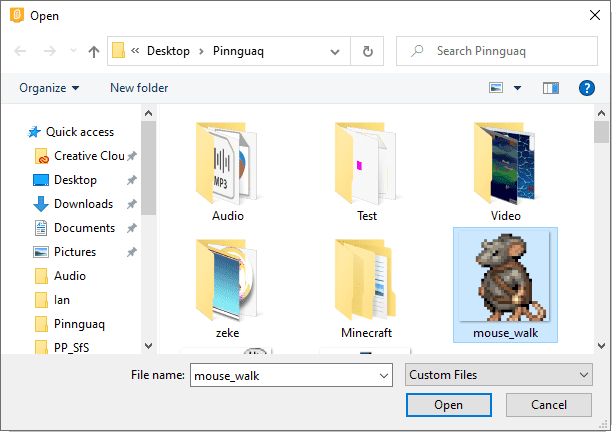
- Add your walk cycle sprites to the project by clicking on the Choose a Sprite button, then click Upload Sprite.
- Select your animated walk cycle GIF from the location you saved it, and click Open.
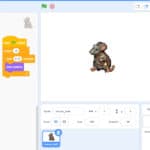
- Your character sprite should be added to the Stage of your project. If you navigate to the Costumes tab of your sprite, you will notice that Scratch has organized all of the frames of your GIF into separate Costumes.
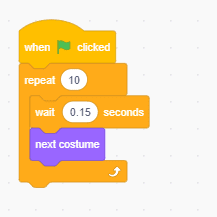
- Now, you can use the “Next Costume” block, along with a “Wait” block, inside of a Forever Loop, to set your sprite to animate within Scratch. The “Wait” block uses seconds for timing, so setting a wait to 0.15 would be the same as the 150ms timing used in GraphicsGale.
- Regardless of what you make, the process of adding them to a Scratch project is the same, so get creating and populate your Scratch projects with your own custom animated sprites!
Conclusion
Walk cycles are the core of most 2D platforming and RPG games. They can range from very simple, two-frame animations, to sequences with dozens of frames played at a higher speed. Generally, the more frames you add, the more fluid your animation will be. Can you take your four- frame walk cycle and expand it into an eight-frame cycle? The extra frames can be used to add more weight and character to the motion, or you could add in unique motion, like a limp or swagger. The motion of your character, as much as the design of it, can inform the user of its personality.
Duplicating frames is the easiest way to build upon a base sprite when creating animations, and it’s not limited to just walk cycles. Try using frame duplication to make some more actions for your character; running, jumping, rolling, or attacking are all great places to test your skills after you’ve got the hang of the walk cycle.
