
Introduction
Scratch is a basic coding language that uses a ‘building block’ style coding to create animated stories, interactive games, simulations, and beautiful artwork. In using Scratch, learners will be introduced to basic coding concepts and develop their computational thinking skills while bringing their own ideas to life. In this series, the basics of Scratch will be introduced to provide learners with the foundational skills required to begin creating in Scratch.
Scratch makes it easy on learners who are just starting out by organizing the types of code you can use into categories, the code blocks are grouped by the following categories: Motion, Looks, Sound, Events, Controls, Sensing, Operators, Variables and My Blocks. These code blocks can be pieced together in the Code Area like placing jigsaw puzzle pieces together. Students can easily test their code and debug problems with their code by having the Code Area and the Stage both visible at the same time.
In this episode, learners will explore:
- Deleting a Sprite
- Adding a Sprite
- Adding a Backdrop
Vocabulary
The following vocabulary definitions are directly from Scratch Wiki.
- Backdrop (Scratch)
- backdrop is an image that can be shown on the Stage.
- Code Area
- The Code Area is the large empty space to the right of the Block Palette. It is an area for storing blocks that run the project. Blocks can be dragged from the Block Palette into the Code Area and arranged to form scripts.
- Sprite (Scratch)
- Either user-created, uploaded, or found in the sprites library, are the objects that perform actions in a project.
- Sprite Pane (Scratch)
- It is a white area located beneath the Stage where all sprites present in a project can be easily accessed to modify or inspect.
- Stage (Scratch)
- The stage is the area where the sprites are and perform their actions. It is located in the top of the area to the right of the Code Area.
Materials
Scratch 3.0 (Online or Desktop)
Computer Activity
This episode will take you through the steps of deleting a Sprite, adding a Sprite and adding a Backdrop to your Stage.
Deleting A Sprite
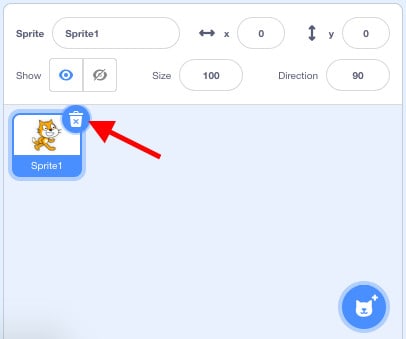
- Every ‘New Project’ on Scratch will begin with the Cat Sprite. In your Sprite Pane, left click on the garbage can, located in the top right corner of the Sprite that you wish to delete.
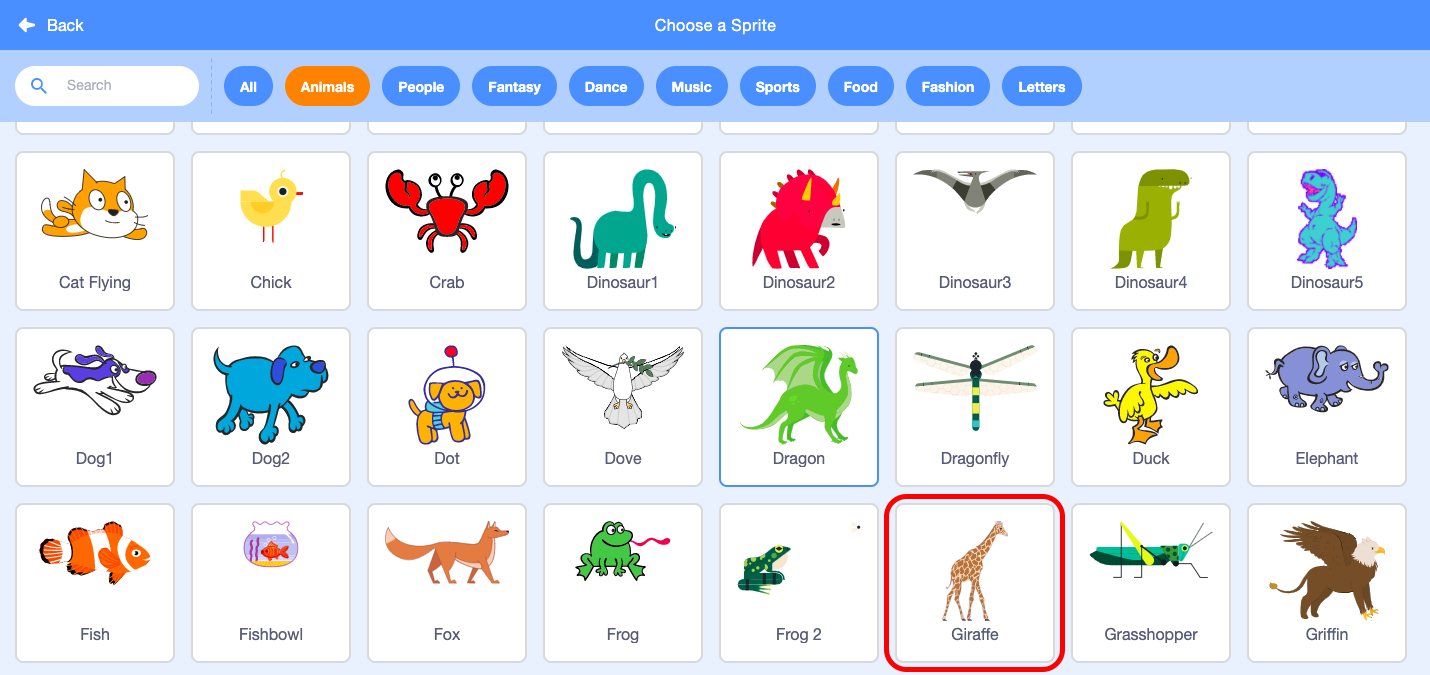
Adding A Sprite
- Hover over the Choose a Sprite icon in the Sprite Pane.
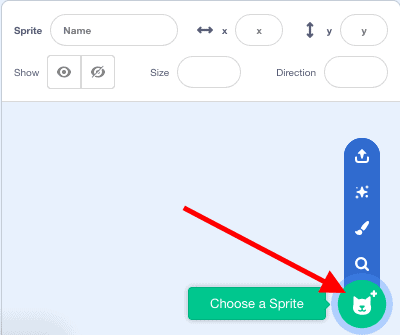
- Select the magnifying glass icon.
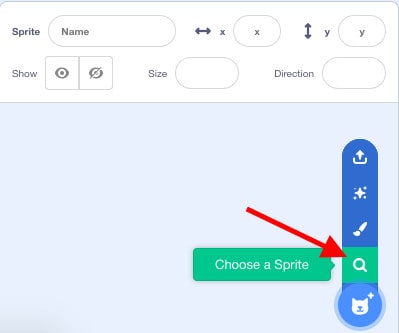
- This will take you to the Scratch Sprite library. You can scroll through all Sprites, search for a Sprite using the search bar or select a category from the top of the menu to find a Sprite.

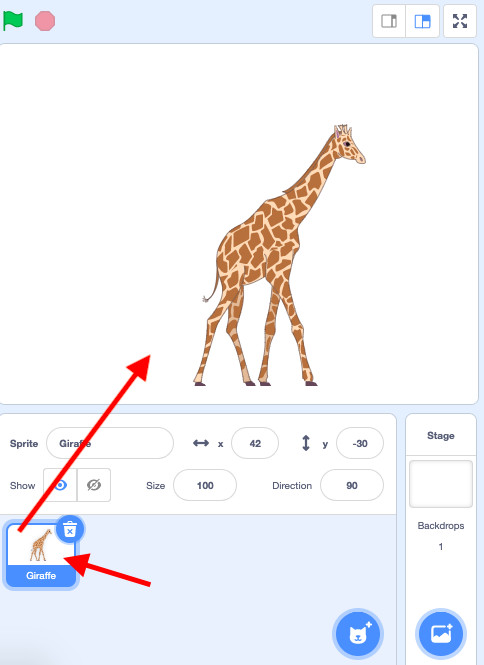
- Add the Sprite that you would like to code by left clicking on the sprite.
- The Sprite that you selected will now appear on your Stage and in your Sprite Pane.
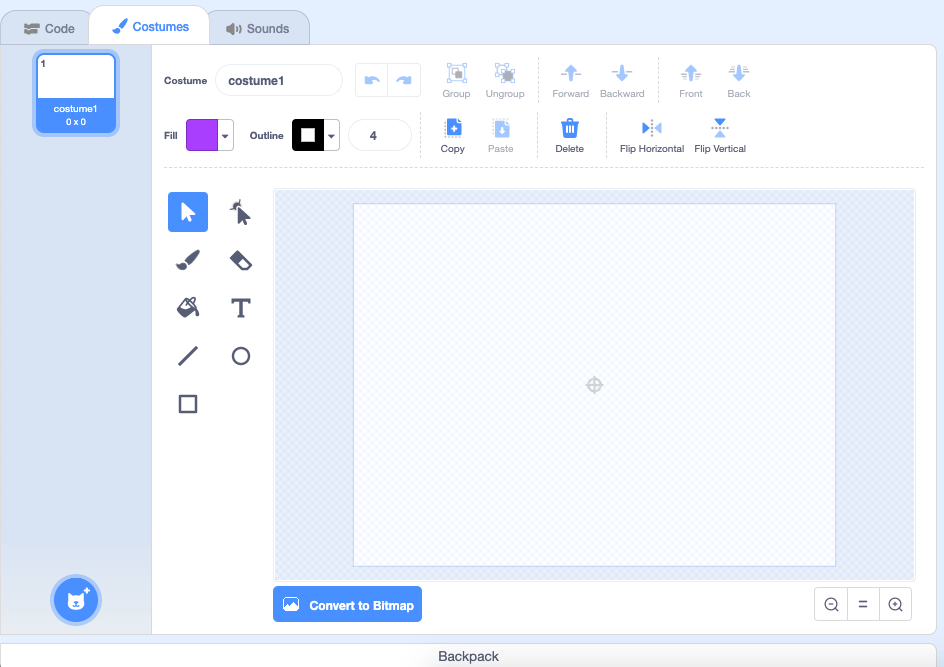
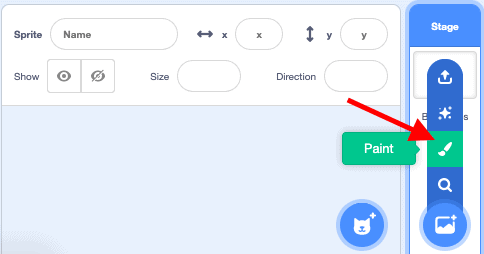
You can also create your own Sprite. To do this you must:
- Hover over the Choose A Sprite icon in the Sprite Pane.
- Select the paint brush icon.

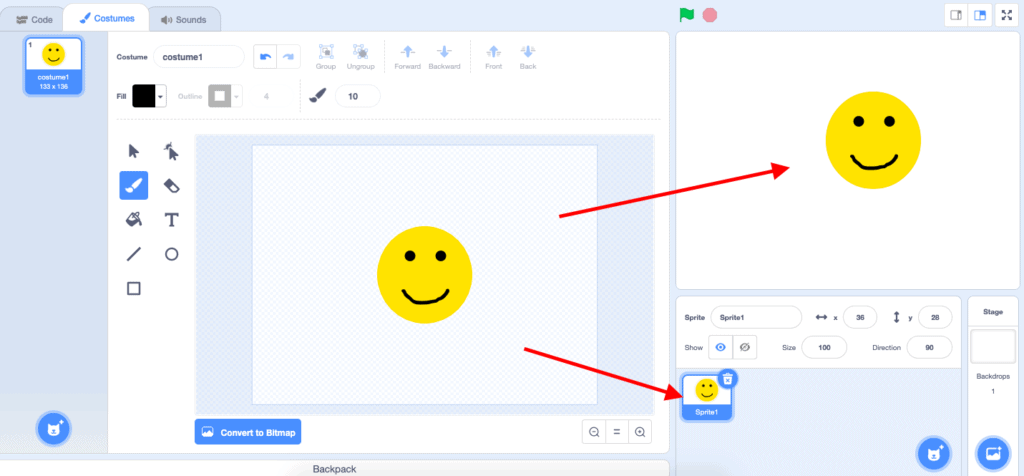
- This will take you to the area in which you can begin to create your own sprite using the tools available.
- You will see this Sprite appear on your Stage and in your Sprite Pane.
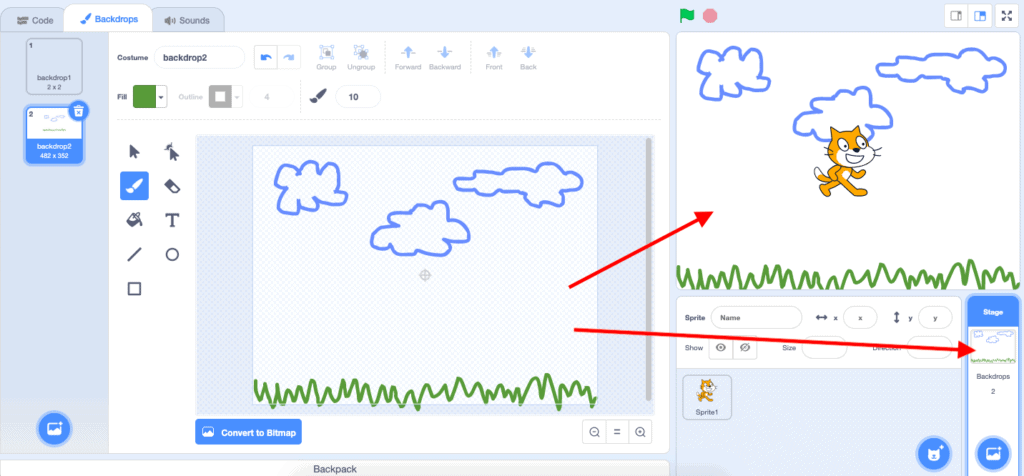
Adding A Backdrop
- Hover over the Choose a Backdrop icon in the bottom right corner of your screen.
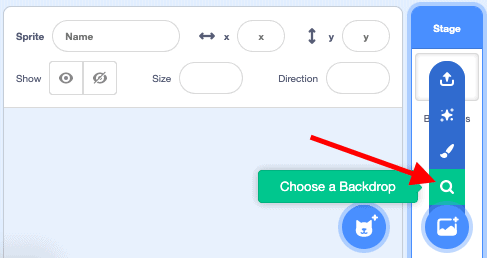
- Select the magnifying glass icon.
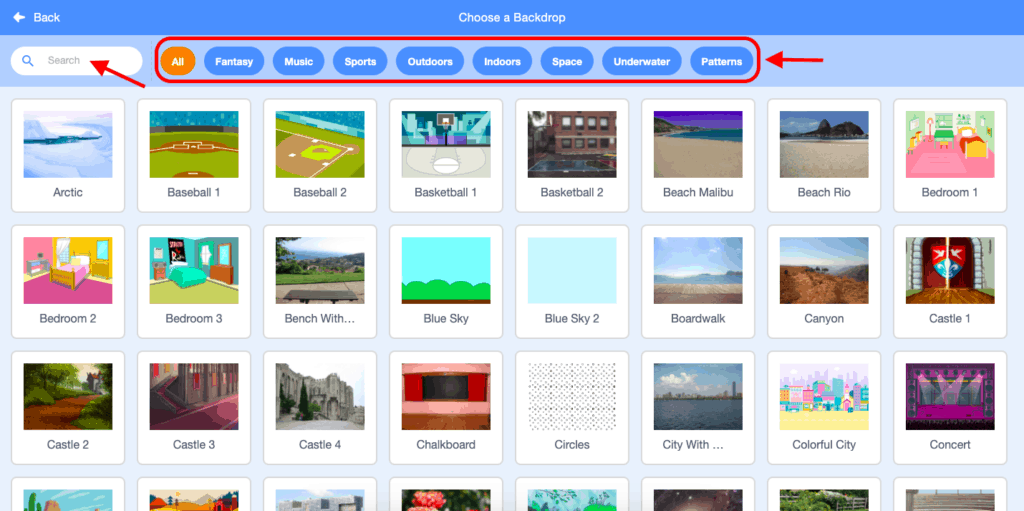
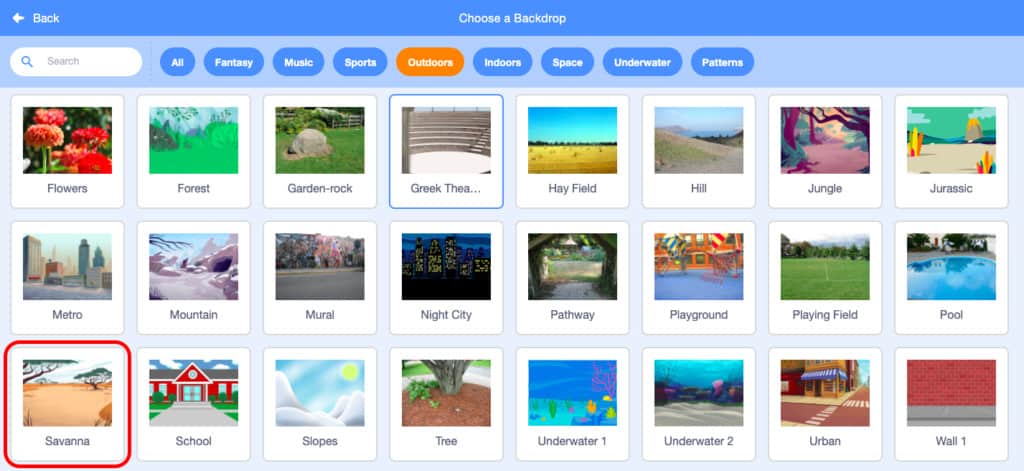
- This will take you to the Scratch Backdrop library. You can scroll through all Backdrops, search for a Backdrop using the search bar or select a category from the top of the menu to find a Backdrop.
- Select the Backdrop that you would like to use on your Stage.
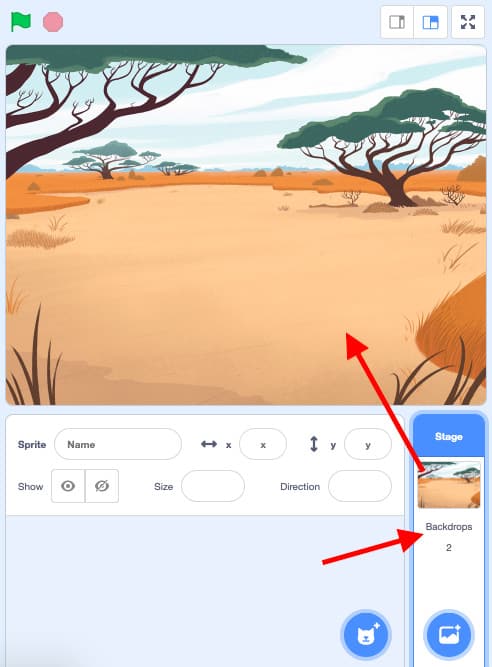
- You will see this Backdrop appear on your Stage and in your Backdrop menu.
You can also create your own Backdrop. To do this you must:
- Hover over the Choose a Backdrop icon in the bottom right corner of your screen.
- Select the paint brush icon.
- This will take you to the area in which you can begin to create your own Backdrop using the tools available.
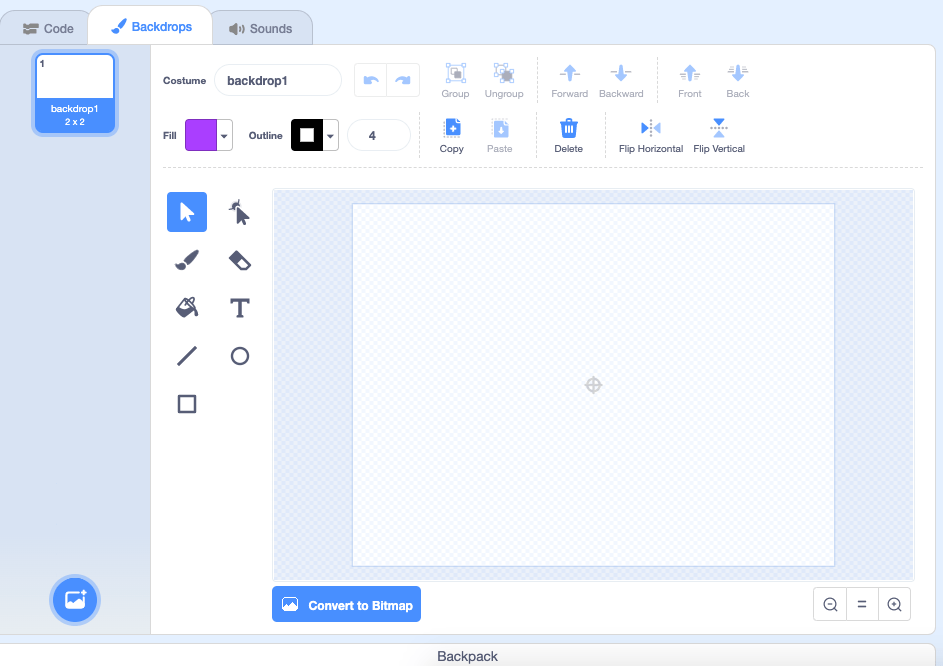
- You will see this Backdrop appear on your Stage and in your Backdrop menu.
Conclusion
In this episode you learned basic Scratch concepts such as how to delete a sprite, add a sprite and add a backdrop. What will you create now that you have learned a few Scratch Basics?
We want to see the awesome things you’re creating! Take a photo or video and share your work with us by emailing media@pinnguaq.com or tagging @pinnguaq on Facebook, Twitter, or Instagram. Don’t forget to include the hashtag #LearnWithPinnguaq! You can also upload your project to the Pinnguaq Studio.
Resources
- Scratch Basics Episode 1 by Becky Wright
You might also like
Fancy numbers in Scratch: Deleting clones and using custom blocks
 Middle – Grade 12
In this tutorial, you will learn to create an updatable number readout using custom numbers in Scratch, through learning to manage Scratch clones as well as through using Scratch’s custom block (“My Blocks) feature.
Using the Backpack in Scratch
Grade 1 – Grade 12
In this short tutorial, you will learn how to use Scratch’s “Backpack” feature to move code and sprites between projects.
Scratch Mix and Match Challenge #3
Grade 7 – Grade 12
Scratch Mix and Match Cards Challenge #3. Making your own games in Scratch is a fun way to learn how to code! Accept the challenge and make a game or story with at least two of the three Mix and Match cards for this challenge!
