
Section Navigation

Introduction
Students will learn about the impact of climate change on the environment and explore other environmental concerns. They will be writing an interactive story that involves the choices we make and their impact on the environment. Before we start it is important that we acknowledge the sacred connection that Indigenous peoples have to the land, and to Mother Earth. Indigenous peoples believe that all plants, animals and everything in the environment is of equal value, and that nothing and no one is less valuable than the other. It is also important to note that Canada is made up of many different Indigenous groups each with their own unique culture, history and views. While creating an interactive story students will be developing their programming knowledge and using CSS and HTML languages. This module should be completed after the Introduction to Twine Module or if you already have a general working knowledge of Twine.
Note: We want to thank Jaime Fortin who acted as the Cultural Advisor for this module. Jaime is a student at Trent University working on a degree in Indigenous Studies. She is from Chapleau Cree First Nation, a small reserve in northern Ontario.
Learning Goals
The learner will be more comfortable with programming and storytelling by the end of this module. They will display their knowledge on environmental issues and the impact humans have on the environment in their interactive story.
Vocabulary
Passage - In Twine, a passage is a narrative unit, a building block for full stories.
Narrative - The process of telling and structuring a story.
CSS - Cascading Style Sheets is a styling language used for coding the presentation of a document in a markup language.
HTML - Hypertext Markup Language is the standard markup language for designing web pages.
URL - Uniform Resource Locator is a web address and is used to identify any resource on the internet.
Mother Earth - The earth considered as the source of all its living beings and inanimate things.
Traditional Indigenous Knowledge - is the basis for local-level decision-making in many communities. It has value not only for the Indigenous culture, but also for scientists and planners striving to improve certain aspects of the area.
Guiding Questions
- Can you list some ways that humans impact the environment? Is it always negative? What ways can we positively impact the environment? For more information check out Humans Induce and Reduce Environmental Disasters by National Geographic.
- Why is it important for us to honor and respect the environment?
Curriculum Links
This module aligns with the science curriculum and ties into environmental science units. Environmental concerns will be explored and can be examined on a chemical or biological level to link to more expectations. It also can be linked to the English and computer science curriculum through digital storytelling.
Materials
- Twine – Download Twine
- Planning Sheet
Non-Computer Activity
Select a story from How Things Came To Be Written by Rachel and Sean Qitsualik-Tinsley | Illustrated by Emily Fiegenschuh and Patricia Ann Lewis-MacDougall (available through Inhabit Media). An introduction to Arctic creation myths for children of all ages.
From the origins of day and night, the sun and the moon, and lightning and thunder to the creation of Arctic animals such as caribou and Arctic waterfowl, this completely revised and re-edited edition – originally published as Qanuq Pinngurnirmata – shares nine classic Inuit creation stories from the Qikiqtani Region of Nunavut.
- Ask students what these stories teach them about the environment and how Inuit people value the environment? What information can you find about other Indigenous groups and their relationship with the environment?
- What can we learn from these stories?
For a free story watch The Mohawk Story of Creation told by Lee Claremont. From this story discuss how the Mohawk people are connected to the Earth. How do the Mohawk people view the Earth? How are they connected to the Earth? What can we learn from the Mohawk people?
Computer Activity
For this module students will be creating an interactive story. They will use their vocabulary from studying environmental issues within their narrative. This project offers students freedom and encourages them to build their programming knowledge. The main focus of their story should be the environmental issue they choose and tie into the impact humans have on the environment. Teachers can add specific details they want the students to include in their digital story and incorporate Indigenous teachings and knowledge.
Research and Planning Activity
Start this module off by watching this video about causes and effects of climate change. It will act as a quick review of climate change and human impacts on the environment.
Students will choose an environmental topic to research. This will be the topic of their digital story. While researching they should look for information on human choices and impacts on the environment. Some possible topics are listed below. Teachers can add and remove topics to meet their course expectations.
- Air pollution
- Water pollution
- Soil pollution
- Fossil fuels
- Biofuels
- Renewable energy
- Non-renewable energy
- Overfishing
- Overhunting
- Shoreline development
- Greenhouse gases
- The Greenhouse effect
- Invasive species
- Initiatives to conserve energy
- The earth’s spheres
Students should also ask themselves what it means to love and cherish the environment and see what traditional Indigenous knowledge they can incorporate into their story. Many times in environmental issues it is important to combine both traditional Indigenous knowledge with western scientific knowledge to come to certain conclusions. An example is the Indigenous people of a certain region might know the migration patterns of moose for the past few decades whereas Scientific Western knowledge may only look at numbers and not fully understand why. Students should also examine ways the Indigenous groups are combating climate change as it relates to their topic. Explore Indigenous Climate Action’s Resources and Links on Indigenous Rights and Climate Change for more information on what is being done to combat climate change.
Once students have researched their topic and thoroughly examined human choices and impact they should start a rough plan of their story. Things students need to consider when planning their story include how they want it to start, what vocabulary they need to include, what choices they will have in their story and their consequences, and how the story is going to conclude or wrap up. Included with this module is a planning handout for students to organize their information. The students should have their research and plan reviewed by the teacher before starting the Twine portion of the project.
Getting Started
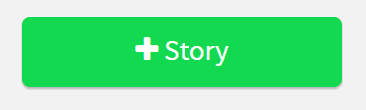
- Open Twine and start a new story by clicking “+Story” on the right side of the screen.
2. Name your story something relevant to your topic, this can be changed later.
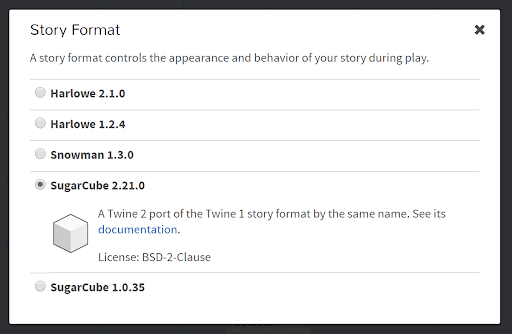
3. Change the “Story Format” by selecting the arrow beside the story title. Select “SugarCube 2.21.0”
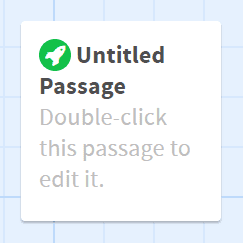
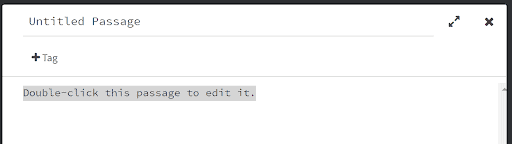
4. To edit a passage double-click on the passage block. This will open up an editing window. Change the title of your passage so you know what is happening in that specific passage. Type what you want to appear in the passage in the large section of the window by double-clicking.
5. Link passages together by typing the title of the next passage in double square brackets [[ ]]. If you want to link to multiple passages type the titles in separate brackets. When you add this to your passage it will create a new passage with that title. Place the links where you want them to appear in your passage.
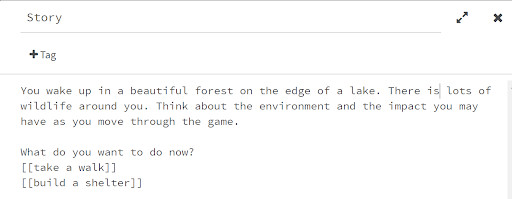
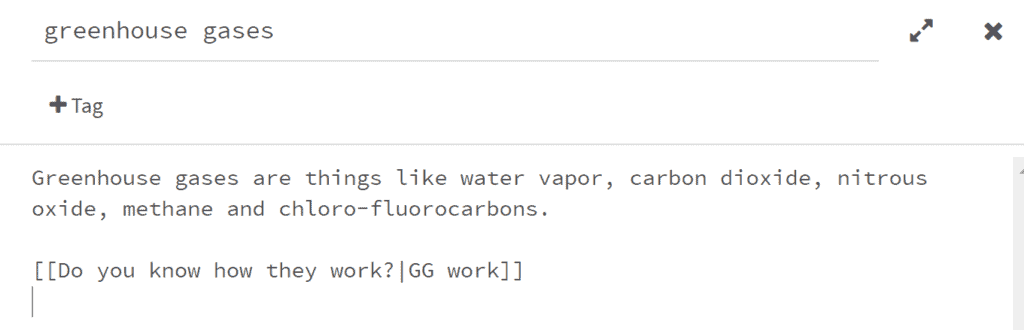
6. If you want the text that links to the next passage to appear different than the title of the passage follow this format [[text you want to appear | passage title]].
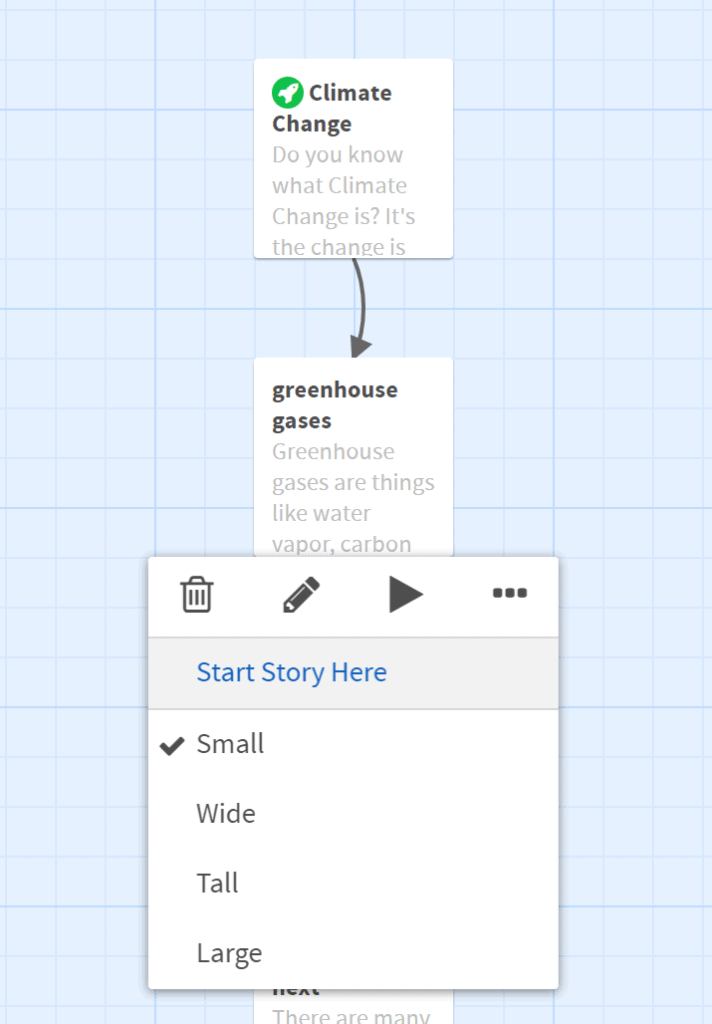
7. The little green rocketship will be on your starting passage. To change this to another passage hover over the passage and click the three dots and choose “Start Story Here”.
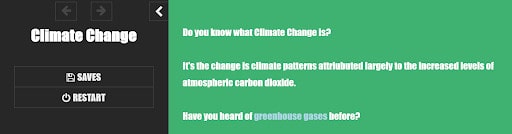
8. To test out your story hit the “Play” button on the bottom right corner of the screen. It will play your story from your starting passage. You can click the links that will lead you to your other passages. The example below has had changes applied to the appearance which you will learn how to do next.

Changing the Default Appearance
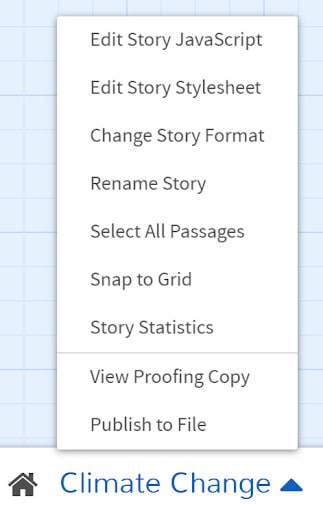
Once you are happy with the layout of your story and have an ending for each path you can start changing the appearance of your story. Click the arrow beside the title of the story and select “Edit Story Stylesheet”. Play around with the different appearance options so you understand how the different lines of code adjust the visuals.
There are a variety of colours that can be used in CSS and HTML programming. W3Schools has a list of colours.
body {
  background-color: MediumSeaGreen;
  color: white;
  font-family: Futura,Impact,Helvetica,sans-serif;
  font-size: 120%;
}
Line 2 changes the background colour to Medium Sea Green.
Line 3 changes the colour of the text to white.
Line 4 sets the fonts. You will want to pick multiple fonts in case someone does not have the font you have programmed.
Line 5 makes the font size a little larger.
a {
  color: LightBlue;
}
This script changes the link colour to Light Blue.
a:hover {
  color: LightSteelBlue;
}
This script changes the colour of the links when you hover over them to Light Steel Blue.
Changing an Individual Passage’s Appearance
To change the appearance of an individual passage you will need to add a tag to that passage. To add a tag double click the passage and select “+Tag” under the passage title. Name the tag something that relates to the passage. For example I have added a tag called “Water” because the passage talks about oceans and I might want to use this tag on other passages that include the topic of water.
.water {
  background-color: CadetBlue;
  color: Coral;
}
To program a class for water we need to have a period in front of the name and then format the same way we did our default settings.
Adding Images
To add images to you story there are two different ways to do it. You can add pictures from the internet by adding the URL to your script. The problem with this is you are limited to images on the internet and you do not have control over the sites they come from. If the site is no longer up you picture will disappear. The other way is what I recommend because it gives you more control over your images. When you publish your Twine story to file you are choosing a location to save it to. Create a folder to save your story in and save the images you are planning on using here as well. Now we can call on these images within the passage we want them to appear.
<img src="ocean.jpg">This script has the image named ocean.jpg appear. If you test your program your image probably won’t appear. To see if the image is going to appear you need to publish to file then go to the folder where it is saved and open the story in a web browser. I noticed my picture was too big. The size of the image can be adjusted.
<img src="ocean.jpg" width="50%">This script sets the size of the image to be 50% of the original.
Adding a Variable
If you want to add variables to your story such as a score or an inventory you will need to start by creating a variable. A score could be added to your story if you want to add questions of ways for participants to gain points. You could also have items within passages for participants to collect and add to their inventory. In Twine variables can be numbers, words or true/false.
<<set $score = 0>>
Variables need to be coded in the arrow brackets. “Set” needs to be included at the start of your code to assign your variable its starting value. The name of your variable is written after a dollar sign symbol. The “=” is used to assign the value to the variable. Adding this to your passage does not show the variable. To set a variable to a word it must be in quotation marks.
<<print $score>> or $score
To show your variable in your passage you need to use the “print” function followed by the name of your variable. This will print the value of the variable at that given time. You can also print your variable by typing the name of your variable with the dollar sign in front. This can be used within your passage to print your variables within sentences.
<<unset $score>>
If you find yourself needing to forget a variable within your story use the “unset” function. This will clear the noted variable.
<<set $score +=1>>
To add to your variable, such as a score, you will need to use “+=1” to add one to your current score variable. Alternatively “-=1” will subtract one from your current score.
<<if $score eq 1>>
Keep up the great work!
<</if>>
If you want something to happen in your story based on the values of your variables you will need to use and if loop. Start by using the “if” function and setting the condition with a required value. Anything that appears after the if statement and before the closing of the if statement will appear in the passage if the condition is met. If it is not met it will not appear. You need to close your if loop with “<</if>>”. To make an if statement check two conditions use “and” between them. If either condition is not met the content after the if statement will not appear. To check that one condition or the other is met use “or” between conditions.
| Notion | Meaning |
| eq | Equal |
| is | Equal |
| isnot | Is not equal |
| gt/lt | Greater than/Less than |
| gte/lte | Greater than or equal/Less than or equal |
Conclusion
Students should present their stories to the class or go around trying each other’s stories out. This will give the students an opportunity to showcase their work and learn from each other’s interactive stories. When students discuss their story with others they should start by explaining why they want to protect the environment and what it means to them.
Resources
- The W3Schools website has a page that lists all of the HTML colours. These are the colours that can be used in Twine as background or font colours.
- There are finished games made in Twine that you can explore on itch.io also check out A Dark Room which was also made in Twine.
- The NASA Global Climate Change website has news articles, interactives, and data to show the effect climate change is having on earth.
- Adam Hammond is an assistant professor at the University of Toronto. He has created a guide to programming in Twine. This guide includes videos and detailed instructions on how to make your Twine project better.
- The United Nations Educational, Scientific and Cultural Organization created a brochure on Local Indigenous Knowledge Systems (PDF) that provides information on sustainability.
- Forbes posted an article explaining how Indigenous knowledge has helped scientists to assess climate change.
- Indigenous Corporate Training Inc. has a blog post that examines the rise in Indigenous knowledge being used in environmental assessments.
- The Conserve Energy Future website lists and gives a short summary on what they believe are the top 25 environmental concerns.
- Watch a video of The Ojibway Creation Story.
You might also like

Exploring Chemical Reactions Using Twine
 Grade 9 – Grade 12
In this lesson students will explore different types of chemical reactions using videos and descriptions.

Exploring Biological Systems Using Twine
Grade 9 – Grade 12
Studentsd will learn about the systems of the human body and how they interact with each other, while creating a story using Twine.

Using Twine For A Novel Extension Activity
Grade 9 – Grade 12
Students will be creating an interactive story based on a novel they have already read through Twine!
