Section Navigation
Introduction
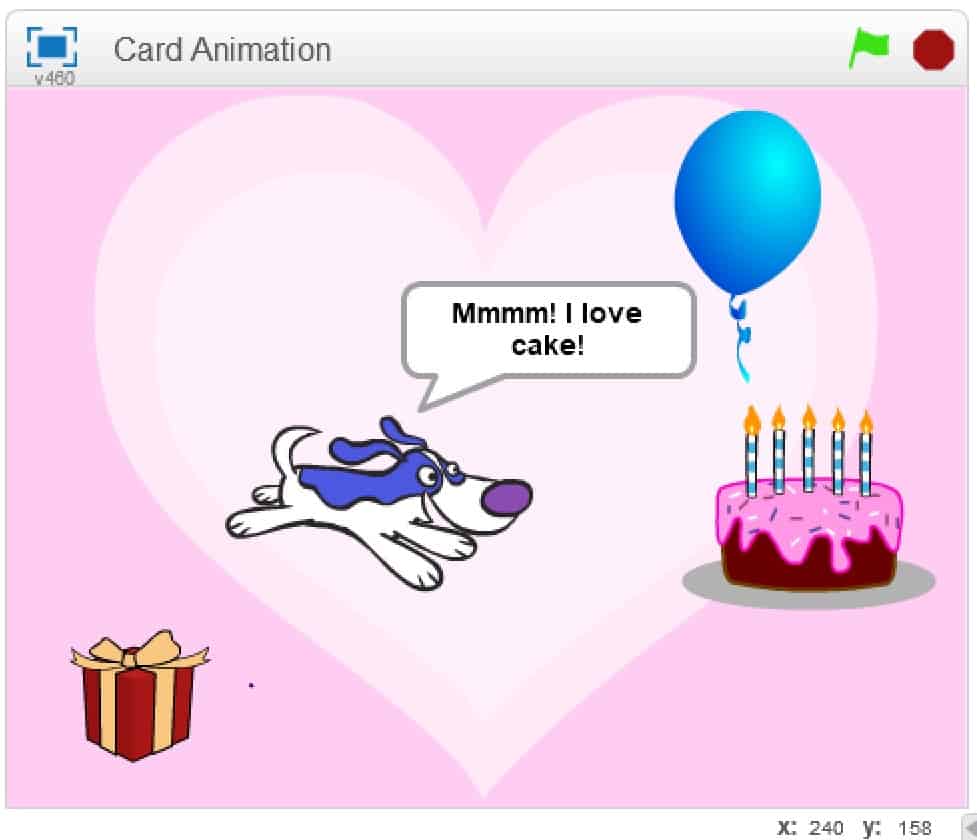
This module teaches some of the basics of animation and has students starting to explore the ‘Looks’ section on Scratch. Students will build on the basics of programming and animation by making and animating a virtual card. Students will work on their writing skills by creating a message that will display during their animation.
Note: We want to thank Jaime Fortin for acting as the Cultural Advisor for this module. Jaime is a student at Trent University working on a degree in Indigenous Studies. She is from Chapleau Cree First Nation, a small reserve in northern Ontario.
Learning Goals
Students will learn animation concepts that will build on their basic understanding of programming and form the foundation for future lessons. They will also work on their writing and reading skills through the creation of a message that accompanies their card, and by reading the messages from other students.
Vocabulary
Animation - Still pictures that change rapidly, giving the appearance of movement.
Event - Something a program can react to, such as a key being pressed.
Loop - Part of a program that repeats itself.
Algorithm - Step by step instructions that perform a task. X movement – Movement left and right.
Y movement - Movement up and down.
Guiding Questions
- What is animation? Animation is when a series of pictures with slight differences are changed quickly, giving the appearance of movement, such as when the pages of a flipbook are flipped quickly.
- What is an algorithm? An algorithm is a series of instructions, such as the steps in a recipe. Algorithms are what computers follow to complete tasks and processes.
Curriculum Links
This module aligns with the Language curriculum through the message that students write in their animated card. Students will add animation which can be tied into the Science and Technology curriculum, specifically units on Motion and Mechanics. Mathematics are involved in this module through changing the values of the blocks. Students will explore numbers and build on their knowledge of number order and magnitude. Indigenous Studies and History can be tied into this lesson plan as the subject matter for their card; students could animate an Indigenous object or event, and write a short message about that.
Materials
- Scratch – Download Scratch
- Adobe AIR (required for Scratch to run) – Download Adobe AIR
- Paper
- Colouring supplies
Non-Computer Activity
Creating a hand-made card
Give each student a piece of paper for making a card. Ask them:
- What makes a card special?
- What should be included in a card?
- Who is your card for?
- What does the recipient like?
These guiding questions will get students thinking about their audience. If there is an upcoming holiday or event that people typically share cards for, students can follow that theme and represent it in their card. To incorporate Indigenous culture students could use the Indigenous language of their area. For example, for Cree communities, students could write Miigwetch instead of Thank You. There are links to different Indigenous language websites in the Additional Resources section of this module.
Computer Activity
Creating an animated, virtual card:
For this module students will create a virtual card with animations. They will add characters that can be interacted with. Students could create a card to mark an upcoming celebration, around which the teacher could create a lesson to tie it all together.
The instructions that follow are general scripts that students might want to include. These scripts can be combined and modified to create a variety of animations.
Students can incorporate Indigenous words using the language links provided. However, the languages and words in these links are not exhaustive, so students could ask their community members for any words they do not know. Before students choose a language to incorporate they can research the area to find out what language was historically used. Some students may even speak their traditional Indigenous language at home.
Activity
- Open Scratch.
- Open a new project and delete the cat by right clicking on it and selecting delete.
- Select a background from the library by clicking the first icon below ‘New backdrop’ (on the left of the screen) and double clicking the backdrop you want.
- Select a sprite from the library by clicking the character icon beside ‘New sprite’ and double clicking the sprite you want.
- Allow students to choose up to four sprites.
- Many of the sprites have multiple costumes. To check for costume options, select the sprite and click the ‘Costumes’ tab at the top of the screen.
- Drag a ‘when flag clicked’ block (found under the ‘Events’ section of the ‘Scripts’ tab) to the script area.
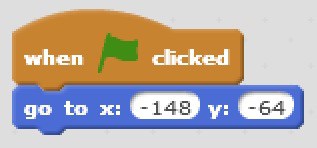
- To set the starting location for a sprite, place the sprite where you want it, then drag a ‘go to’ block (found in the ‘Motion’ section) under the ‘when flag clicked’ block so that it snaps into place.
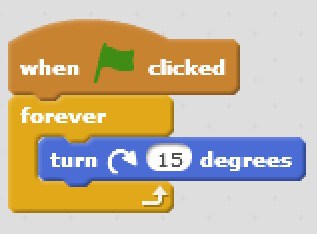
- To make a sprite spin, use a ‘turn’ block (found in the ‘Motion’ section). The arrow tells you what direction it will spin.
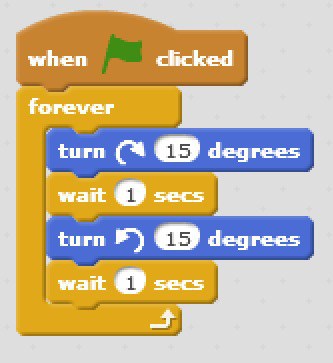
- To make a sprite tilt back and forth, use two ‘turn’ blocks with ‘wait’ blocks after each. ‘Wait’ blocks are found under the ‘Control’ section.
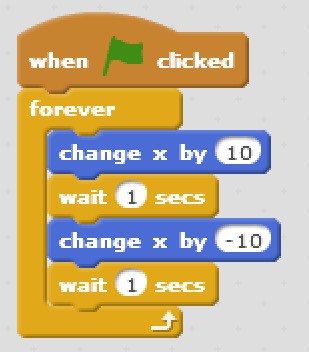
- To make a sprite move left and right use a ‘change x by’ block. To move up and down use a ‘change y by’ block. Both are found in the ‘Motion’ section.
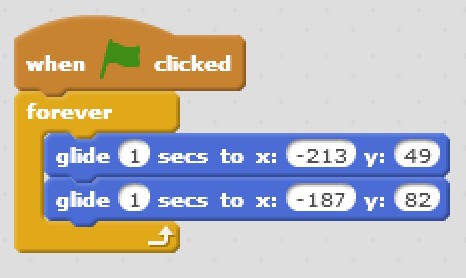
- ‘Glide’ blocks make sprites glide from one location to another and back and are found in the ‘Motion’ section. To change the start and end points for the glide, first place the sprite, then add the ‘glide’ block to the program. It automatically adds the current location of the sprite into the block.
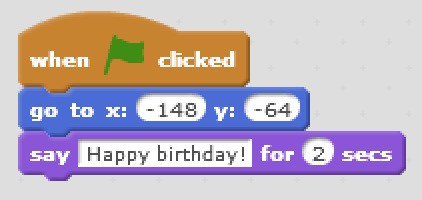
- To make a sprite “talk” use the ‘say hello for 2 secs’ block from the ‘Looks’ section. Replace “hello” with anything you’d like your sprite to say.
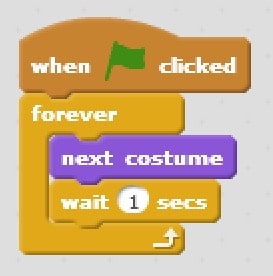
- To make a sprite switch costumes, start with a ‘forever’ loop (found in the ‘Control’ section), and add the ‘next costume’ block (found in the ‘Looks’ section) inside the ‘forever’ block. Add a ‘wait’ block underneath it, so that the costume change isn’t too fast.
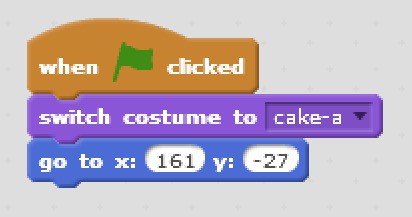
- If you want your animation to start with a specific costume, add the ‘switch costume to’ block at the start of your script.
- To make a sprite animate after it is clicked, start the script with a ‘when this sprite clicked’ event block.
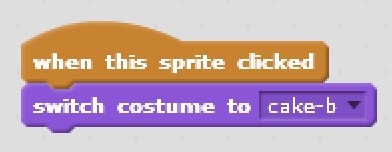
- Any values in the program can be edited. Negative numbers make movements in the opposite direction of the positive numbers.
Conclusion
Play a game of Simon Says with the students using actions that can be mimicked in Scratch such as spin in a circle, say hello, or walk to the right. Students can take turns being Simon. For older students add in the number of times you want them to repeat the motion and include forever loops for added difficulty.
Resources
- Code.org has online courses to teach computer science fundamentals to children between the ages of 4 and 8.
- Hour of Code has hour long sessions that teach programming and have different themes that are of interest to children. The students get a certificate of completion at the end of the hour that they can print. Sessions are organized by grade and topic.
- Left Brain Craft Brain is a blog that has activities for teaching children how to code. The activities are a mix of off screen and online.
- The Cree Dictionary is an online repository of Cree Words.
- The Ojibwe website (PDF) has a list of basic Ojibwe words.
- The Inuktut Tusaalanga website has basic words and phrases in Inuktituk.
- The Gudeh website has basic Dene words and phrases.


