Section Navigation

Introduction
Métis people are one of three recognized groups of Indigenous peoples within Canada. The Métis were famous for their elaborate floral beadwork used to adorn clothing and other materials for sale and trade. “Dot Art” uses dots of paint to mimic these traditional beading styles. Students will learn about Métis people through an exploration of Dot Art, and how to create pixel art for video games.
We want to thank Alyssa Amell for writing the computer activity in this module. Alyssa is an Indigenous artist and an arts advocate. Alyssa believes being close to art is very important, that art doesn’t have to be on paper or on your computer, rather something you experience all around you.
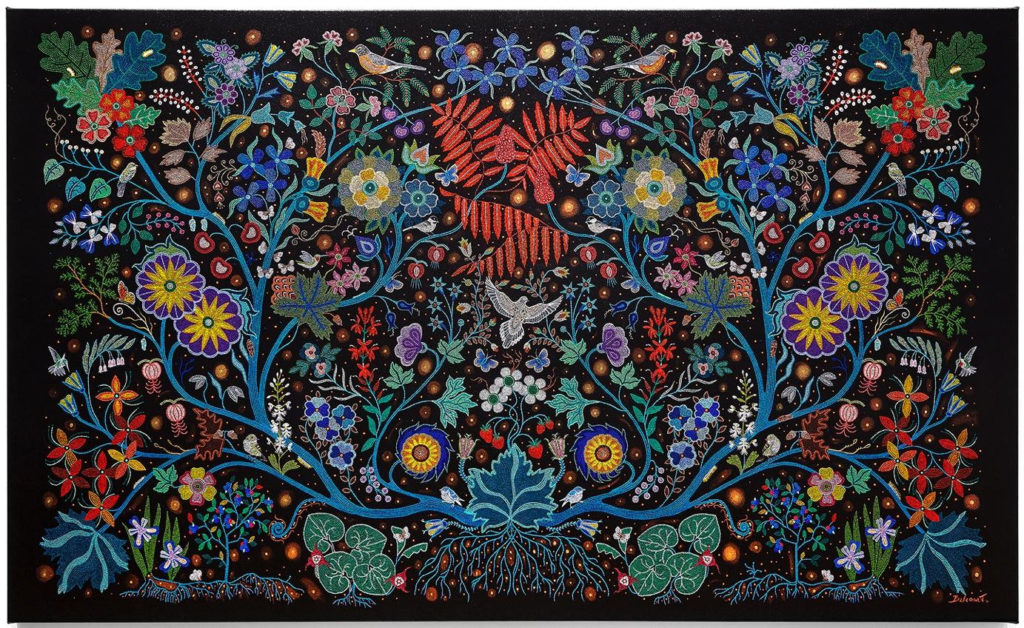
Finished images can look like this (created by Métis artist Christi Belcourt):
Learning Goals
Students will learn how to create images for video games inspired by the traditional Métis art known as Dot Art.
Vocabulary
Michif - The Métis language.
Métis - One of three groups of Indigenous peoples in Canada. They are the descendants of European and First Nations relationships.
Hue - A pure colour, without any tint, shade, or tone applied to it.
Tint - A hue with white added to lighten it.
Shade - A hue with black added to darken it.
Tone - A hue with white and black (grey) added to create a less saturated hue.
Guiding Questions
- Have you ever played the game “Lite-Brite”, where you use small coloured plastic pegs to form an image on a light box?
- Who has seen beadwork before? Can you describe it?
- Who knows what the fur trade is?
Curriculum Links
This module aligns with the Art, History, and Heritage and Culture curriculums. Students will come away with a greater understanding of the Métis culture, their tradition of beadwork, and Dot Art. It also touches on the Computer curriculum as students will learn to apply what they learn about Dot Art to create digital pixel art for video games.
Materials
- Autodesk SketchBook – Download Autodesk SketchBook
- Paint
- Paper
- Rocks
- Paint brushes or thin sticks
- Scratch 3
Non-Computer Activity
Go on a nature walk to collect supplies for your non-computer art piece. Look for rocks and thin sticks. On a piece of paper or a rock that you collected use four different paint colours to form an image. Use the end of the paintbrush or sticks dipped into paint to make dots. Students could create images of flowers or landscapes to create art inspired by traditional Dot Art, or exercise their creative freedom and create anything they like! Check out some of Christi Belcourt’s art for inspiration. Also explore some Metis beadwork which inspired Dot Art.
Computer Activity
Students will create Dot Art digitally using the brush spacing and layers tool in Autodesk Sketchbook.
Autodesk Sketchbook Instructions
- Download and install the free program Autodesk Sketchbook. Open Autodesk Sketchbook.
- There are three menus you will see on your screen. Explore the menus and familiarize yourself with the tools available. Start by exploring the brush palette. Hover over any icon to see the name of the tool.

3. The toolbar is across the top of the screen. In this toolbar you can flood fill, add text, add rules and more. Explore the tools available in this menu.

4. The white circle is the brush puck. This allows you to change the opacity of your brush. The black circle is the colour puck and allows you to change colour and brightness. To change the opacity and brightness click and drag within the circle.

5. In the bottom right corner you will find another menu called the “Lagoon”. This has some of the key tools from the other menus so you can close them and have a less cluttered screen.
6. If you close any of the toolbars and want to open them again click “window” at the top of the screen and select which toolbars you want to see.
7. To navigate around your page, access the Zoom tool (the magnifying glass icon in the upper toolbar), or you can scroll your mouse wheel to zoom in and out. To pan around, hold the spacebar and click and drag to move the canvas around your screen.
Activity Instructions
- Select a colour for your background. Click the Flood Fill tool (the bucket icon) in the upper menu, and click your canvas to fill your background with your chosen colour.
- Select a new, different colour that we will use to paint with on top of this background colour.
- Select the Layers icon (the three stacked pages icon beside the Brush Palette tool) to open the Layers palette. Clicking the lock icon while a layer is selected locks that layer to prevent it from being moved or edited unexpectedly.
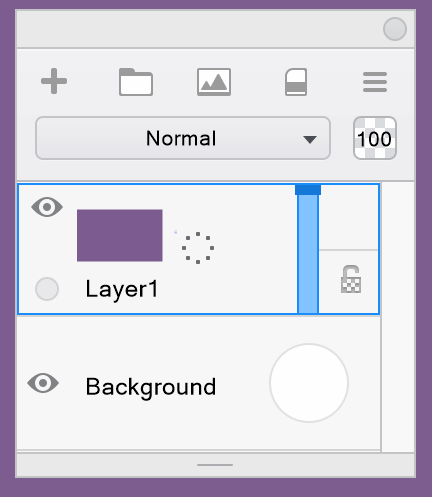
Add a new layer by clicking the Add Layer button (the plus sign icon). This adds a new layer above the layer where we created our background. Clicking and holding anywhere on the layer displays a secondary navigation wheel. Hold and drag around this wheel to Add, Delete, Lock, Hide, Duplicate, Merge or Rename a layer.
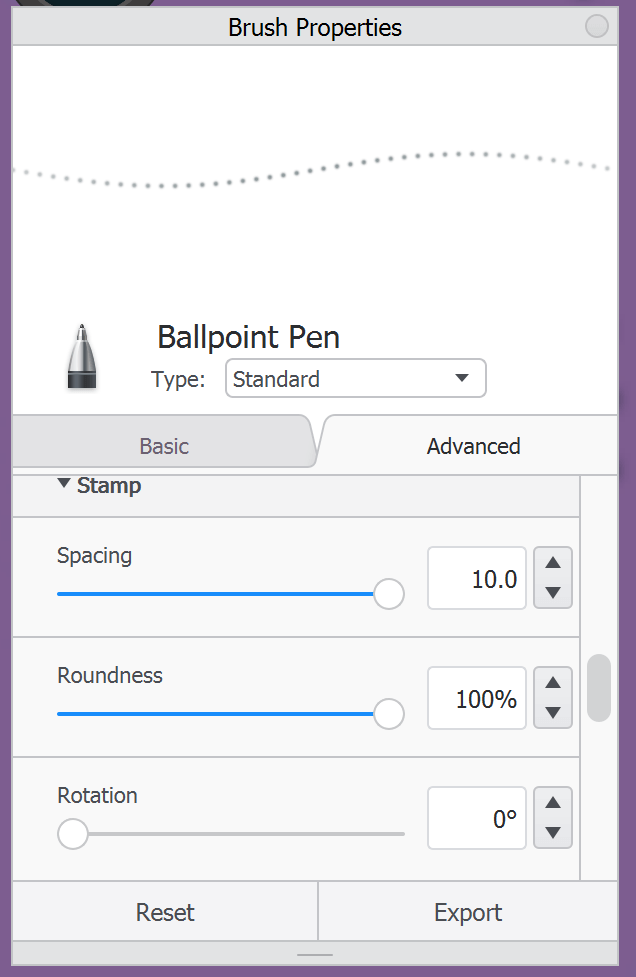
4. With our new colour selected click the Brush Properties icon (slide bar icon).

Within the Advanced settings, under Stamp, change the Spacing to 10.0. This will allow us to make many dots as we drag our pen, and will save a lot of time!
5. Originally Metis women were decorating clothing with dyed porcupine quills. This limited them to more geometric shapes and patterns. Try making a geometric shape on your background with your pen tool.
6. The Metis children learned from the Grey Nuns how to do French silk embroidery which included a lot of floral patterns. The Metis applied their new skills and knowledge with their traditional methods to form Metis beadwork. Try to make a more intricate pattern or design such as a flower.
7. Under Nib, in advanced settings, you can change the Edge of your brush to be Soft or Sharp. Play around and experiment with these different settings to see what kinds of lines and shapes you can make.
8. Click and drag around the canvas to create your art! Work with a variety of colours and shades to create depth. Under the Basic settings in the Brush Properties palette, change the Size of your brush to create variety and interest.
9. If you make a mistake, click the Undo or Redo arrow buttons in the upper or lower toolbar, or hold the Ctrl+Z or Shift+Ctrl+Z keys.
10. Once you are happy with your art, save it as a JPEG or PNG file so it can be used in a program like Scratch.
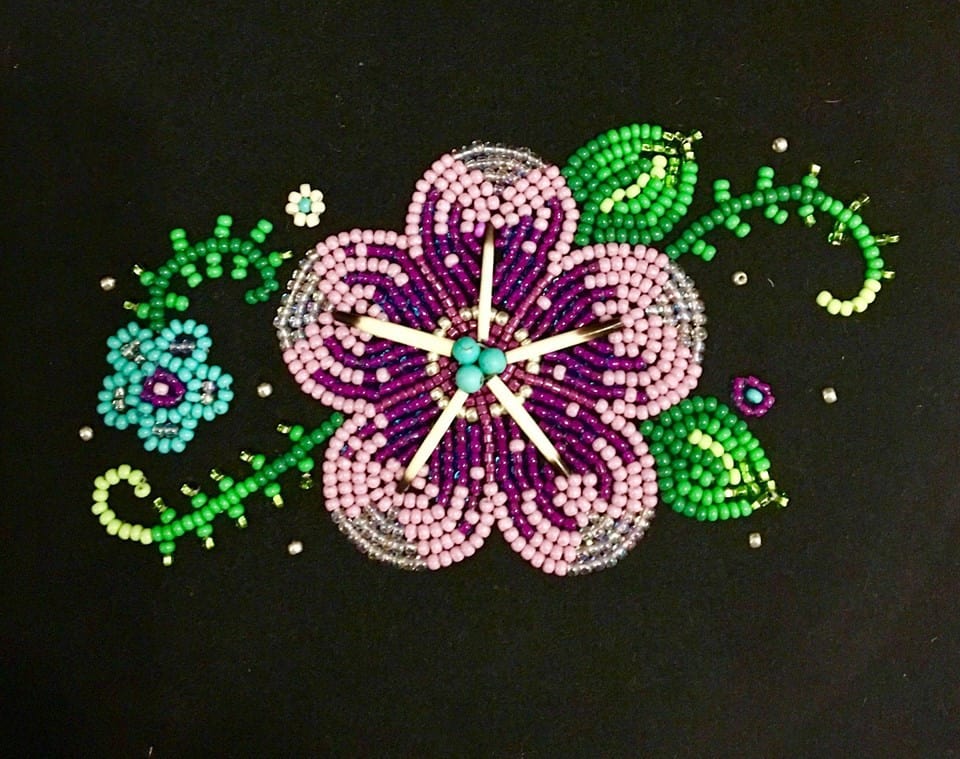
If students are struggling to decide what to draw, have them try and recreate traditional Metis beadwork digitally. The image below is a piece by 4 Sisters Metis Beadwork would be a good one to try.
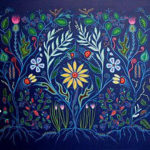
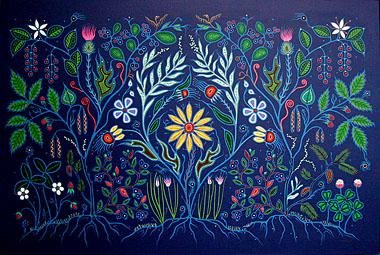
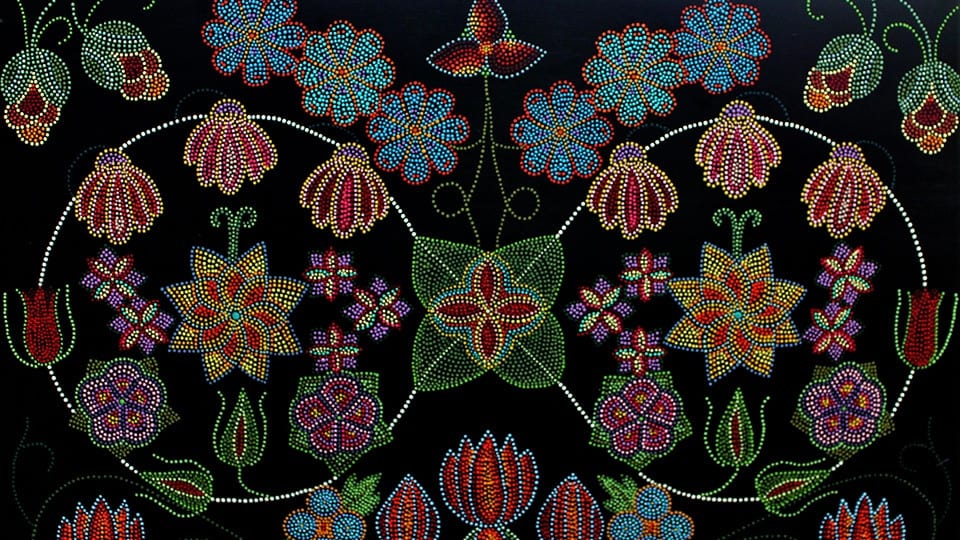
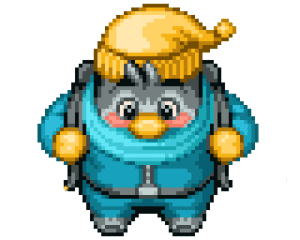
Have fun! Exercise your creative freedom and create anything you like! Here are some examples digital dot art, created by artist Brian Kon (Image Source):
Tips
Given the highly unique nature of art, based in creative freedom and personal expression, there are infinite ways of creating, so what follows are merely ideas and suggestions.
- Students could colour an image with solid colours, taking the above images as examples. Begin by creating a solid background colour, then creating large shapes on top of that, and building shadow and highlight areas to define shapes and create interesting patterns. Experiment with placing similar coloured dots, or rows of dots, side by side to create gradations of colour.
- Add details to your Dot Art. Though it can sometimes appear simple, these artworks often have incredible detail to them. Experiment with making dots of various sizes to create depth and detail. Though our dot application often suits circular forms, explore making a variety of non-circular shapes.
- Be conscious of your background colours. If you plan on using duller colours such as dark greens and browns, choose a background colour that will help them stand out. If you are unsure of what colour to pick, a shade of grey generally works.
- Practice with different mediums. Mediums are different types of materials, such as acrylic paint, pencil, crayons, markers, etc. Don’t force yourself to use a medium that doesn’t feel natural. Try different tools; if you don’t like paint brushes, paint with your hands!
- Experiment, explore, play, and have fun!
Conclusion
Have students share with each other their Dot Art projects through a gallery walk. What did they design? Why did they choose the colours they did? What did they find challenging? How did working on a digital Dot Art project compare to working in a traditional Dot Art medium?
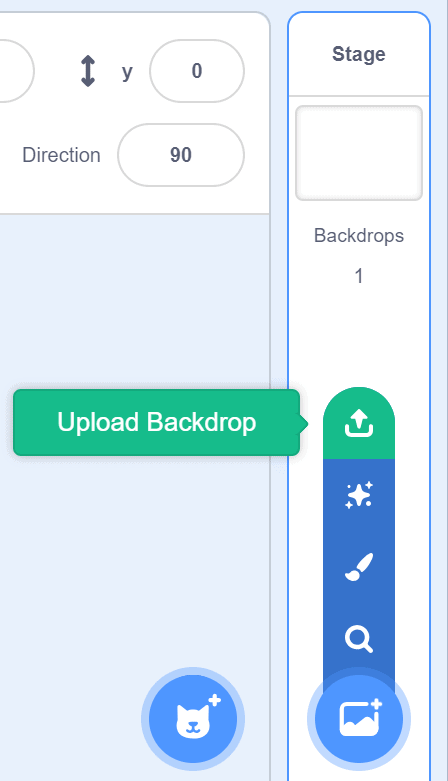
The Dot Art you create can be used as a background in Scratch. To add your image as a background open Scratch 3.
- In the bottom right corner of your screen there is a backdrop button, hover over the button and select “Upload Backdrop”. This will open up your file explorer so you can find your image.
2. After you have uploaded your image you will be taken to a screen for editing backgrounds. From here you can add text and additional drawings.
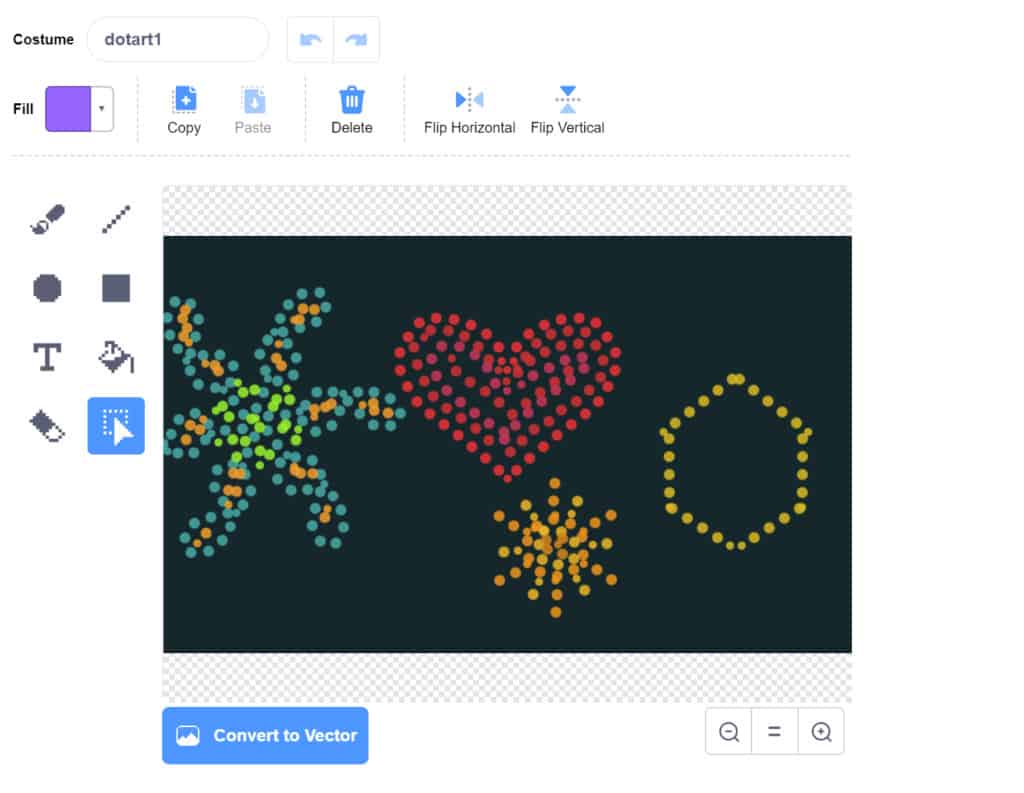
3. If you can see the checkered pattern your background will not cover the entire background in your game or animation. To fix this you can use the fill button to fill it in with your background colour.
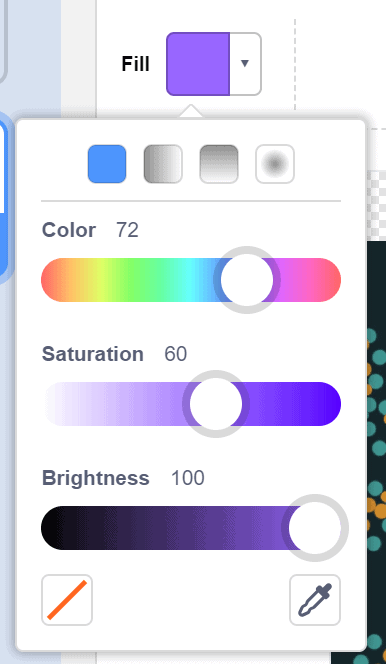
4. To choose the same colour as your background click the colour beside “Fill” and select the eye dropper and choose your colour.
5. Now you have a beautiful background for you to use for making an animation or a game.
Extension Opportunities
Students can create pixel art characters using GraphicsGale to add to their background in Scratch. To learn how to make your own sprite try Pinnguaq’s lessons Pixel Power – Sprite Creation and Pixel Power: Sprites for Scratch.
If you would like to make your own game using Scratch checkout Pinnguaq’s lessons Chase Game for Beginner Game Designers and Lost in Space: Intermediate Moving Maze Game Tutorial.
Resources
- Christi Belcourt is a Métis Visual Artist.
- Iris Scott breaks a lot of rules when it comes to art. She makes beautiful art with just her hands!
- Lisa Shepherd is a Metis artist who specializes in beading.
- Beading Our Identity: “The Flower Beadwork People” is a written piece that details the history behind the Metis beadwork.
You might also like
Pixel Art
In this series students and teachers will be introduced to software programs GIMP and GraphicsGale, as well as how what tiling is and how to do it, and animation with these programs.
Creating Voxel Art With MagicaVoxel
 Grade 9 – Grade 12
Are you a fan of pixel art? In this lesson we take pixel art and make it 3D using voxels! Learn how to use Magicavoxel and create a world of your own.
Creating Art In Inkscape
Grade 9 – Grade 12
Learn how to use the basic tools in Inkscape to create a vector art using a reference image.
