
Section Navigation

Introduction
Students will learn how to model a 3D house in SketchUp. 3D modeling is a talent that requires continuous learning as each modeling software has its own unique interface. SketchUp is easier to learn than software such as Blender, but can be used for a multitude of things. The house students build can be used for game assets, home renovation ideas, physical building layouts and much more. While SketchUp is a 3D building application, it can be used for many applications.
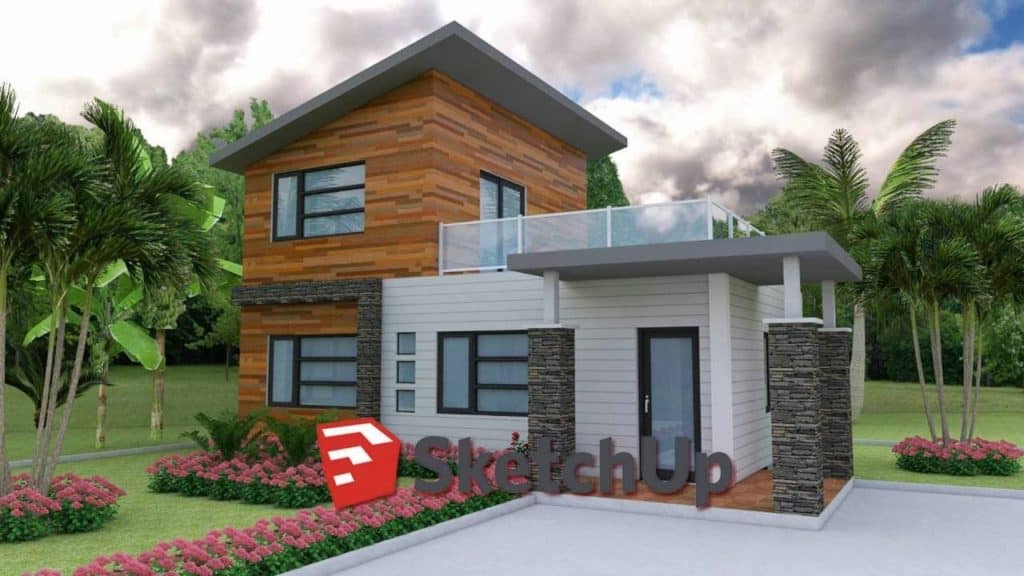
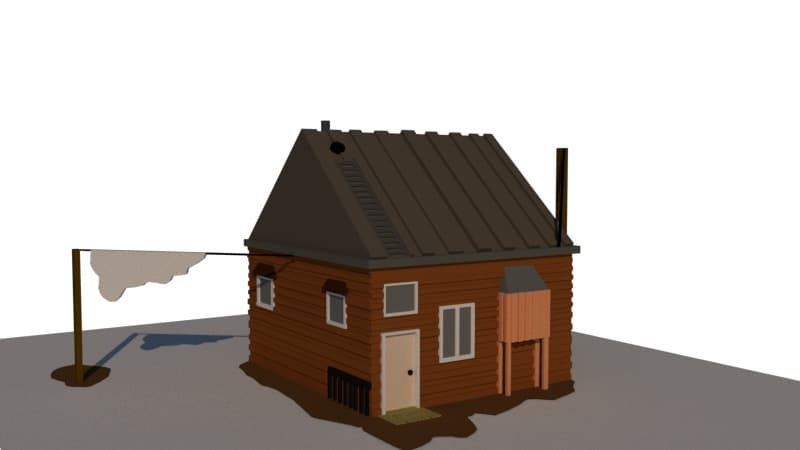
Here is an example of what you can do:
Vocabulary
Axis - an axis is an invisible line upon which coordinates are placed or referenced. Two-dimensional objects exist in two planes, or axes, x and y representing width and height. Three-dimensional objects have a third axis, the z axis, representing depth.
Toolbar - the place where all of the program tools can be accessed.
Learning Goals
Students will learn how to use the 3D modeling program SketchUp to create a building. This will further their understanding of the possibilities and applications for 3D modeling.
Guiding Questions
- How can building structures help the process of learning 3D modeling?
- Is there ways you can use SketchUp beyond house renovations?
- How can referring to drawings or pictures help with creating a 3D model?
Materials
- Paper, pencils and coloured pencils
- SketchUp – Download SketchUp
Non-Computer Activity
Before we work on the computer, we will draw a house using pencil and paper. It will act as our reference when we begin designing on the computer. A reference is a useful guide when building your 3D model, that helps keep things in perspective.
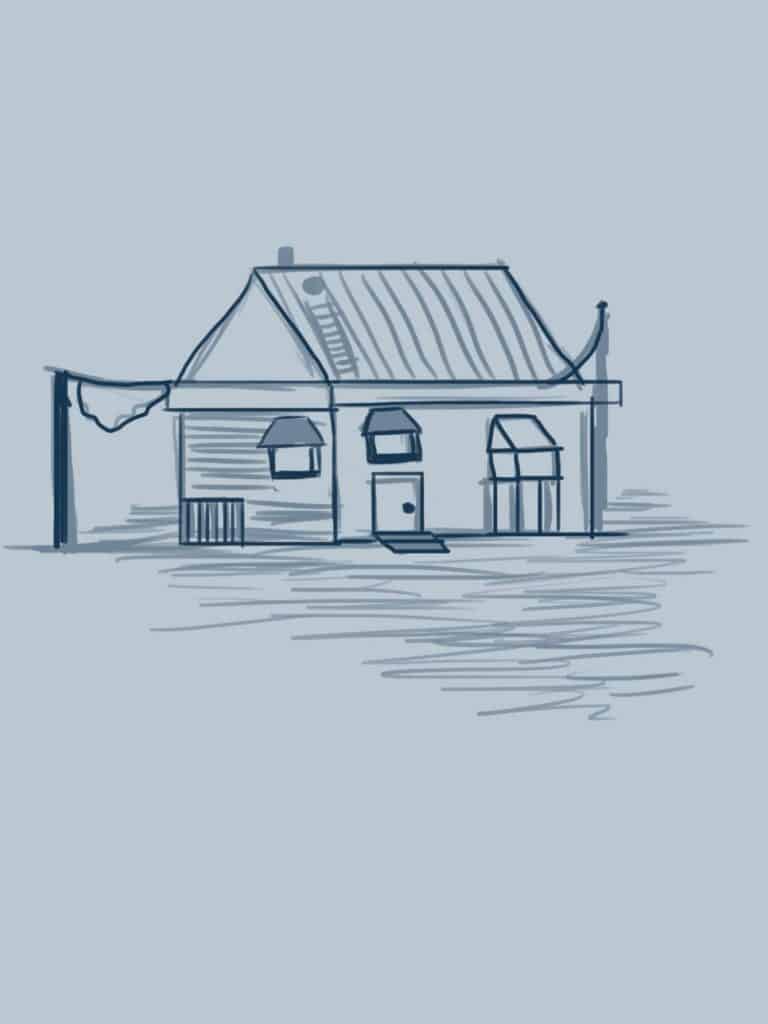
This quick sketch that will be our reference for this activity (image by Alyssa Amell).
It shows us what we are going to model. Though it is a flat, two-dimensional image with few details, it will act as our blueprint for what to include in the final product.
Your model does not have to look like your drawing in the end, but having a guide helps you remember what you want to create, and keeps you on track.
Computer Activity
We will create a 3D model from our 2D drawing.
Step 1
Let’s start by exploring SketchUp’s interface. When SketchUp opens, there are menu windows and a blank world with a character named Stacy. Right click Stacy and erase her. Some users keep Stacy in their model to show the size of their model compared to the height of a human. Under the Window menu click Instructor which brings up a helpful window that shows an animation and information about whatever tool you have selected. This can be helpful for users just starting out in SketchUp. With SketchUp you can build to scale, and/or use SketchUp’s capabilities to measure dimensions for you. For this activity we will focus on the basic modeling tools. Along the top of the screen are the standard File and Help tools. Below is the default toolbar, Getting Started, which we will use the most. On the right side is the Default Tray with multiple editor and builder windows. For this module we will only be using the Material dropdown. There are also three perspective reference lines called Blue, Red, and Green axis to represent the X, Y, and Z axes. Move around by middle clicking and dragging the mouse, or by clicking the circled arrows on your toolbar and using the hand tool.
Step 2
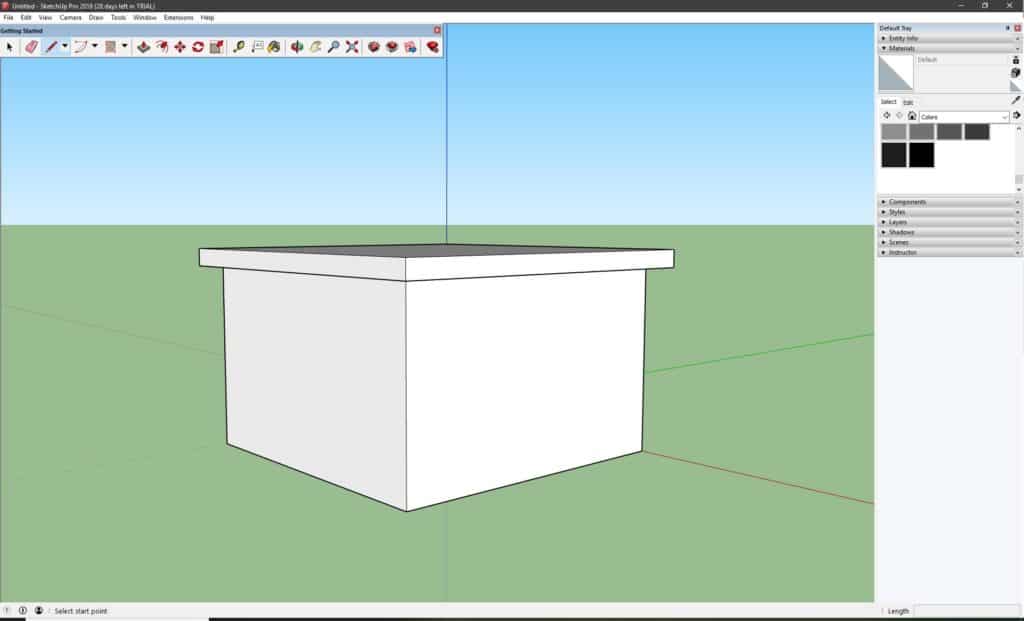
Build the base for your house! Create a floor plan to your liking. With the Lines tool (the pencil icon in the Getting Started toolbar) draw lines by left clicking and dragging across the screen. SketchUp has guidelines in place that force your lines to follow along the blue, red, or green axis. As you draw, your line will turn the colour of the axis you are following; this helps keep your shapes aligned and work with the perspective grid.. If you make a mistake, or something happens that you didn’t expect, use Ctrl+Z to undo, or use the ESC key to stop drawing a line or making a selection. Once you have created your floor, we will add dimension to it using the Push/Pull tool. Select the side you wish to raise or flatten, and drag your mouse up or down.
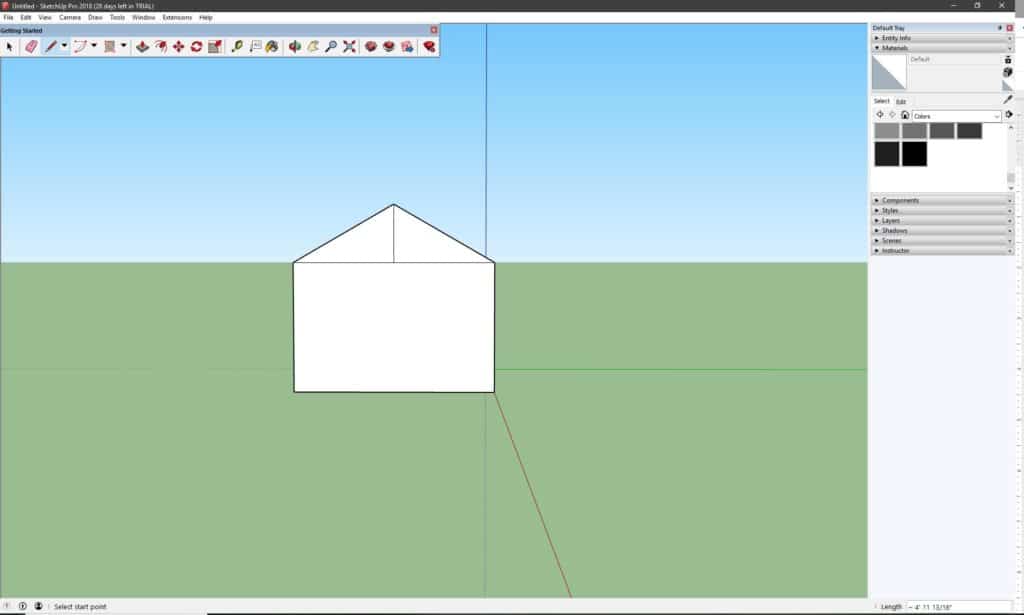
Step 3
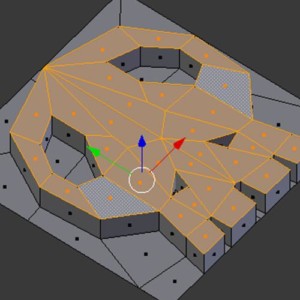
Every house needs a roof, so let’s make one! To build a symmetrical triangular roof, find the midpoint of your base, by using the line tool and moving your mouse along the top of the wall until a small blue dot appears (indicating the centre point), and then click and drag upwards. With the line in the middle on your base, create both sides of the roof by connecting the middle to the edge of the base.
Example:
The line in the middle of the triangle can obstruct your ability to push the roof evenly, so erase it with the eraser tool. Then use the Push/Pull tool to extend the roof to the other side of the house by clicking and dragging. Rotate your view as needed so you can see what you’re doing. If you have made a flat roof use the line tool to create a line on the edge of your base, then use the Push/Pull tool to create a flat roof. You can also use this for detailing your house and adding dimension to flat surfaces. For instance you could create siding by doing this multiple times and staggering the lines to create an interesting texture.
Step 4
Now it is time to build the rest of our model referring to our reference drawing. While we won’t be creating a rendered 3D model for this course, SketchUp has powerful tools and capabilities. In the Extension Warehouse under the Windows tab, are a number of different materials and objects.
Step 5
Colouring your model. Use the paint bucket tool in the Getting Started toolbar to add colour. This opens the Materials dialogue with the variety of colour options. In the drop-down menu you can also choose different materials, such as Wood, Metal, or Stone, etc.. In the Edit tab, you can further customize colours and textures by adjusting their tone, colour, pattern size, and opacity. You can also use the alt key, click on one part of your model to then customize that section, making your creation look unique and more like your drawing.
Step 6
Experiment with the different tools as you design your model. You can also design the interior of your house. SketchUp is used by architects and interior designers to model house designs and renovations, so there are lots of tools available to customize your interior, by adding furniture and different surfaces.
Finally, we are done. Here is what our model looks like:
Conclusion
Now that we have covered the basic tools to create 3D models, students can practice what they have learned by modeling other objects, working from reference drawings they have made. They could experiment with making something other than a house, perhaps an animal or a car.
Resources
Here are some resources if students or teachers want to expand on what was covered in this module.
- SketchUp Video
- SketchUp Learn
- SketchUp Twitter
- SketchUp Facebook
- Sketchup Tutorial For Beginners
You might also like

Building A House In Unreal 4 Series
In this lesson plan series, author Leah Jackett takes students and teachers through a introduction to Unreal 4, how to plan and build a house in Unreal, and add assets into your created scene.
Intermediate 3D Modeling In Blender
 Grade 9 – Grade 12
Learn how to 3D model an object using a plane, the knife tool, and modifiers in Blender!

Introduction To Blender: Part 1
Grade 9 – Grade 12
Blender is a 3D modelling program and can be very complex if you don’t know what menus to use. Learn how to navigate Blender and create 3D models.
