
Introduction

In this quick tutorial, I will show you how to use the Scratch online editor’s “Backpack” to help you move snippets of code and other things between Scratch projects. Using the Backpack is one way to avoid repeating yourself as you develop new and more complex Scratch projects. Along the way, you will also learn about the computational concept of “libraries” and how they also help to support the principle of “Don’t Repeat Yourself”.
The phrase “Don’t repeat yourself”, often abbreviated as DRY, is an application of the computational thinking concept of abstraction and it means trying to avoid duplication in your code as much as possible. In Scratch, there are a couple of ways this can be done:
- Within a sprite, custom blocks are effectively a shortcut that you can use to reduce the number of times the exact same code pattern appears.
- Within a project/sprite, you can use clones and costumes to avoid having duplicate sprites if you need many sprites doing essentially the same thing.
The challenge for the Scratcher, though, is staying true to the principle of DRY between projects. In addition to the points listed above, this might also mean not having to re-upload the same sprites and costumes multiple times to different projects and all the work associated with renaming them to what you want them to be; or it might mean not having to manually remake blocks in a new project that you already made in a previous one. Scratch offers “remixing” as a solution to address these challenges, but remixing means copying an entire project. What if you only wanted to copy some parts of a project? Or, as you become more advanced, what if you wanted to combine different parts of many projects?
Vocabulary
Backpack (Scratch) - A feature of the online Scratch editor that can be used to copy blocks, sprites, and other assets from one Scratch project to others.
Don’t Repeat Yourself, DRY (programming) - A principle, related to the computational concept of abstraction, that means trying to avoid writing repetitive or duplicate code.
Library (programming) - A collection that contains many related pieces of code that do similar or related functions. Libraries can be shared between programs and help to reduce the duplication of code for recurrent or common tasks. Many programming languages, for example, have a library that deals with “Math” related code and common math operations, such as trigonometry, logarithms, exponents.
Materials
- Scratch (online)
- Using the Scratch Backpack (starter project)
Computer Activity
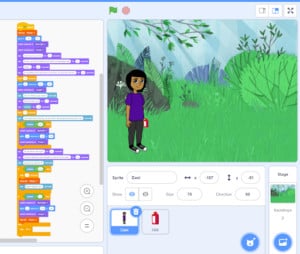
For this tutorial, I will provide a starter project with a sprite that can be used to write both letters and numbers. This is a sprite that has both costumes and code that could potentially be used across many different projects, so I want to put it in my Scratch Backpack to make it available to me for future use.
Locating and looking inside the Backpack
1. The Backpack is located below the sprite’s script area. It is collapsed (closed) by default, so look for a bar that says “Backpack” at the bottom of the screen and click on it to open it. If you need help with this, look at the animated screenshot below:

2. Once the Backpack is loaded, you’ll be able to see anything that’s already been put in there. If you’ve never used the Backpack before, your Backpack will be empty.
3. Since my Backpack isn’t empty, I want to draw attention to the icons in the Backpack. These will be important later when you will be taking things out of the Backpack.

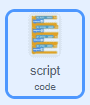
You can see that for each item in the Backpack, there’s:
- a picture
- a type (script or sprite, in this example)
- a name (two of them are named code and one of them is named writer)
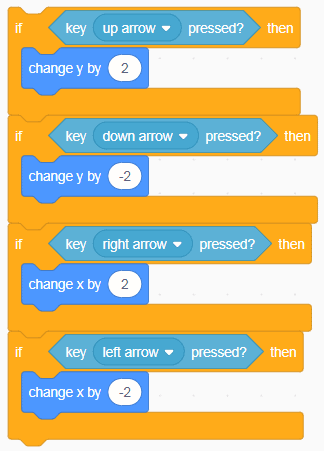
4. For scripts that are put in the Backpack, a small picture of the script is included so that you can tell which script it is. The first script (pictured below) is for detecting inputs for movement. I’ve included the actual code blocks so you can compare them.
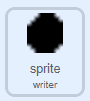
5. For sprites that are put in the Backpack, the picture is a costume of the sprite (whichever was in use when the sprite was put into the backpack) and the name is the name of the sprite. In my case, I already have a sprite called “writer” in my Backpack, and the last costume that the sprite was using was a “period”:
Putting something into the Backpack
Now that you have some idea of where the Backpack is and what can be stored in it, you will practice using it by putting the “Fancy Writer” sprite into the Backpack. The Fancy Writer sprite in the starter project combines and improves upon code developed in the Fancy Text and Fancy Numbers tutorials. If you’re unfamiliar with those tutorials, here’s a quick summary of what the Fancy Writer sprite contains:
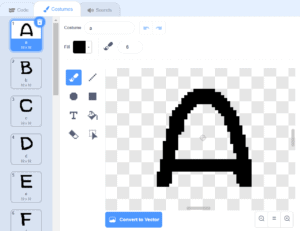
- 42 costumes, which include costumes for every letter of the alphabet and the numbers 0 to 9, as well as some other miscellaneous symbols (e.g. negative sign, punctuation marks). Each costume is named for the symbol that it is (e.g. the costume for the letter “s” is named “s”).
- 97 Scratch blocks that allow for the writing of custom-styled text and numbers using clones. This includes the reading of text as well as its positioning.
When a sprite is put into the Backpack, all the scripts, costumes, and sounds associated are stored with it. For the Fancy Writer sprite, this means that every costume and all the Scratch code will stay together. The steps for putting something in the Backpack are:
1. Open the Backpack.
2. Click and drag the item you want into the Backpack. In this case, try dragging the Fancy Writer sprite into your Backpack. If you need help, see the animated screenshot below:
3. If you were successful, the Fancy Writer should now show up in your Backpack.
Using something from the Backpack
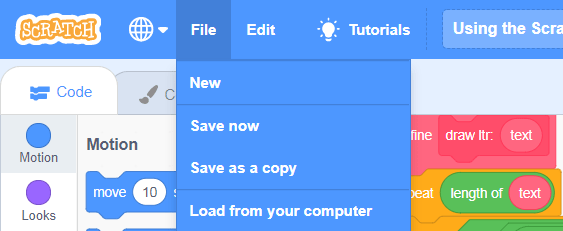
To illustrate how the Backpack works, you will need to go to a different project or create a new one. For the purposes of this tutorial, I created a new project by going to “File > New” at the top:
In your new project:
1. Open the Backpack.
2. Drag the item that you want to use out of the Backpack to where you’d normally put something of its type. In this case, since Fancy Writer is a sprite, you would drag it to where your sprites are, below the stage. If you need help, see the animated screenshot below:
3. You can check to make sure everything was copied over correctly by clicking on the “Costumes” tab for the sprite and making sure all the costumes are there.
Deleting something in your Backpack
To delete something in your Backpack:
1. Open the Backpack.
2. Right-click on the item that you want to delete and then click on “Delete”. If you need help with this, see the animated screenshot below:
3. Notice that the copy of the sprite that you dragged out of the Backpack stays in your project. Once you drag out an item from your Backpack, it becomes its own independent object.
Because the sprite, once dragged out of the Backpack, is effectively detached from the Backpack version, if you want to update the code of the sprite in the Backpack, you will need to delete the sprite that is still in the Backpack and drag a new sprite with updated code into the Backpack.
Using the Backpack in Scratch is one way that you can apply the computational concept of abstraction to reduce duplication of code that you’re writing. Scratch already provides some abstractions through the built-in blocks that it makes available, and the Scratch extensions are like libraries that add new functionality and allow you to use existing blocks in new ways. The Backpack brings you one step closer to being able to have your own library of code that you’ve written yourself and can reuse between projects. It’s not perfect, of course: in true DRY fashion, you would want to be able to update your library code in only one place; in Scratch, as mentioned in the “Deleting something in your Backpack” section, when you drag something out of your Backpack, it actually creates a new, independent copy of that item, whether it is a sprite, costume, sound, or script. Still, using the Backpack means being able to more rapidly create and develop in Scratch and reduce the amount of time you might spend reproducing things that you have already made. In that way, the Backpack is an invaluable tool for you to grow as a Scratcher.
We want to see the awesome things you’re creating! Take a photo or video and share your work with us by emailing media@pinnguaq.com or tagging @pinnguaq on Facebook, Twitter, or Instagram. Don’t forget to include the hashtag #LearnWithPinnguaq! You can also upload your project to the Pinnguaq Studio.
Resources
Additional Resources
- Scratch Wiki (Backpack)
- Scratch Wiki (Exporting and Importing: an offline alternative)
You might also like
Responsibilities to Mother Earth: Interactive Storytelling with Scratch
 Grade 7 – Grade 12
Learning how to make interactive stories in Scratch.
Working with clones in Scratch: Making fancy text
Middle – Grade 12
In this tutorial, learners will explore using clones to display text using a custom font in Scratch.
Fancy numbers in Scratch: Modifying and adapting existing code
Middle – Grade 12
In this tutorial, learners will analyse, modify and adapt code from a previous tutorial to display custom art for number-based readouts.
