
Introduction
Scratch is a basic coding language that uses a ‘building block’ style coding to create animated stories, interactive games, simulations, and beautiful artwork. In using Scratch, learners will be introduced to basic coding concepts and develop their computational thinking skills while bringing their own ideas to life. In this series, the basics of Scratch will be introduced to provide learners with the foundational skills required to begin creating in Scratch.
Scratch makes it easy for learners who are just starting out by organizing the types of code you can use into categories. The code blocks are grouped by the following categories: Motion, Looks, Sound, Events, Controls, Sensing, Operators, Variables and My Blocks. These code blocks can be pieced together in the Code Area like placing jigsaw puzzle pieces together. Both the Code Area and the Stage are visible at the same time which allows learners to run code, test, debug and view their creations.
According to the Scratch Wiki, Scratch’s coordinate system uses 2 coordinates, “X coordinate” and “Y coordinate”, to determine the location of a sprite on the stage. The “X coordinate” value determines the horizontal location of the sprite and the “Y coordinate” value determines the vertical location or height. Every Scratch project whether it be a game, story or animation will always have the x,y grid behind the stage to determine where sprites are located.
In this episode, learners will explore:
- Moving their sprite up and down using the arrow keys
Vocabulary
The following vocabulary definitions are from the Scratch Wiki.
- Block Palette (Scratch)
- The Block Palette is the area on the left of the screen when the Code button is opened. On the left, there is an area that contains the nine sections of blocks in Scratch. To the right of that, there is an area that contains blocks that can be dragged into the Code Area to make code.
- Code Area (Scratch)
- The Code Area is the large empty space to the right of the Block Palette. It is an area for storing blocks that run the project. Blocks can be dragged from the Block Palette into the Code Area and arranged to form scripts.
- Sprite (Scratch)
- Either user-created, uploaded, or found in the sprites library, are the objects that perform actions in a project.
- Sprite Pane (Scratch)
- It is a white area located beneath the Stage where all sprites present in a project can be easily accessed to modify or inspect.
- Stage (Scratch)
- The stage is the area where the sprites are and perform their actions. It is located in the top of the area to the right of the Code Area.
- x-coordinate
- A sprite’s x-coordinate is its location on the x (horizontal) axis of the stage. The value increases or decreases depending on how far right or left (respectively) on the Stage the sprite is, where the horizontal center is 0.
- y-coordinate
- A sprite’s y-coordinate is its location on the y (vertical) axis of the stage. The value gets higher or lower depending on how far up or down on the Stage the sprite is, from where the vertical center is 0.
Materials
Computer Activity
This episode will take you through the steps of making your sprite up and down on the Stage.
Add Your Sprite and Background
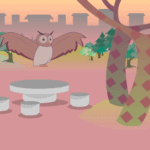
- Choose a Backdrop for your project and a sprite that you want to code to make it move up and down on the Stage. If you need help with how to choose a sprite, see Scratch Basics – Episode 2: Deleting a Sprite, Adding a Sprite & Adding a Backdrop for more information.
Setting the Start Position of Your Sprite
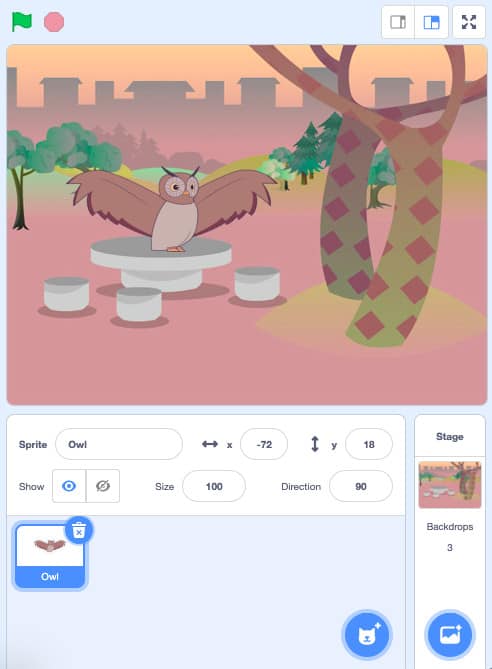
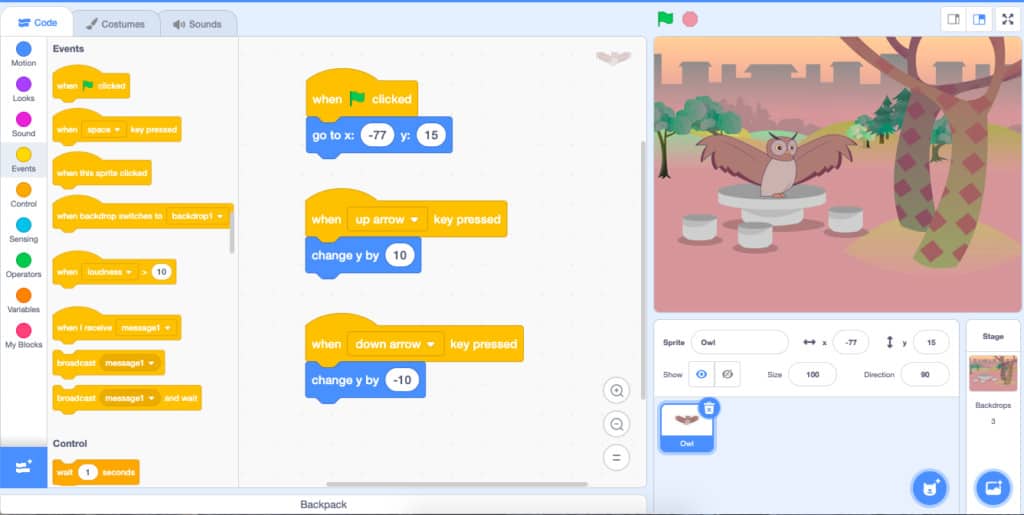
- Click and drag a “when green flag clicked” block from the Events category in the Block Palette.
- Click and drag your sprite on the Stage to the location you want your sprite to begin, each time you run your code.
This will change the x-coordinate and y-coordinate of your sprite in the Sprites Pane.

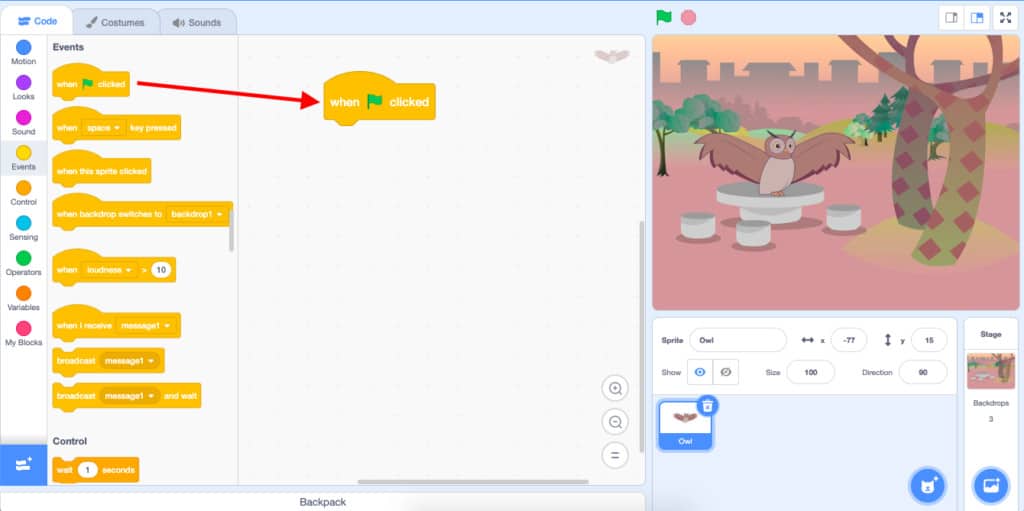
- Click and drag a “go to x: y:” coordinates block from the Motion category in the Block Palette on to the Code Area. This block will tell your sprite where to begin on the Stage when you run your code. You will notice that the x-coordinate and y-coordinate inside the block match the x-coordinate and y-coordinate of your sprite in the Sprites Pane.
Moving Up and Down
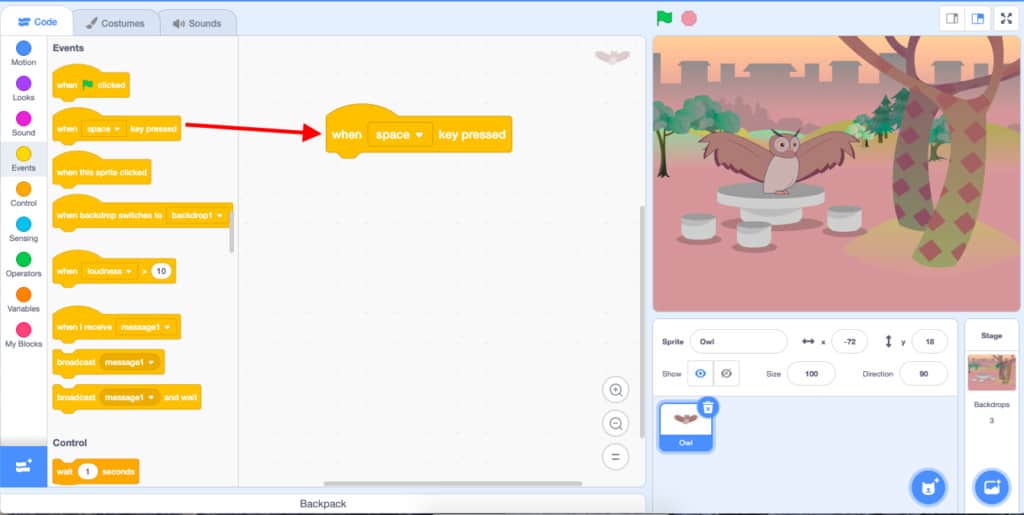
- Click and drag a “when space key pressed” block from the Events category in the Block Palette.
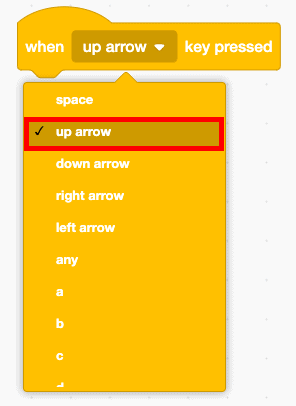
- Click on the drop-down menu in the “when space key pressed” block and select the “up arrow”. This will tell your sprite that when you press the up arrow it will run the code underneath it.
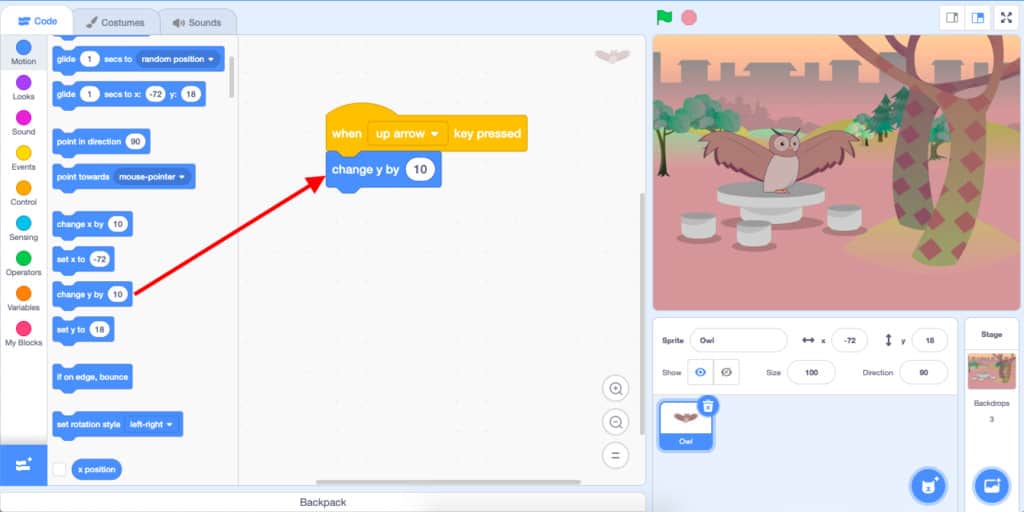
- Click and drag a “change y by 10” block from the Motion category in the Block Palette. Attach this block to the ‘when up arrow key pressed’ block. The “change y by 10” block tells your sprite to move up the y-axis because the number is getting bigger. Therefore when you press the up arrow key your sprite should move 10 places upward on the y-axis to a new y-coordinate.
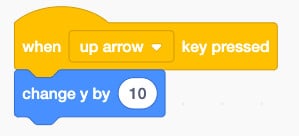
Your code for the up arrow will now look like this:
- Click and drag a second “when space key pressed” block from the Events category in the Block Palette.
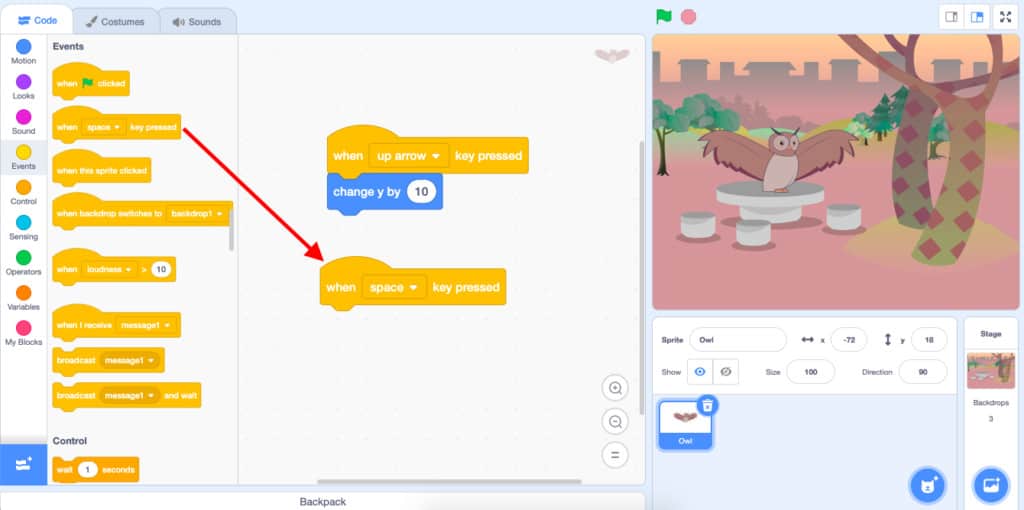
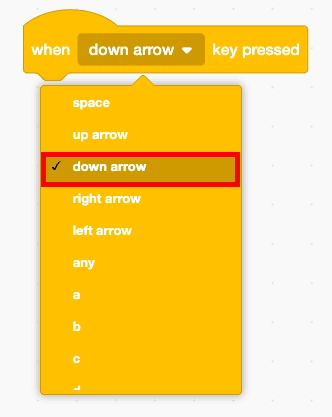
- Click on the drop-down menu in the “when space key pressed” block and select the “down arrow”. This will tell your sprite that when you press the down arrow it will run the code underneath it.
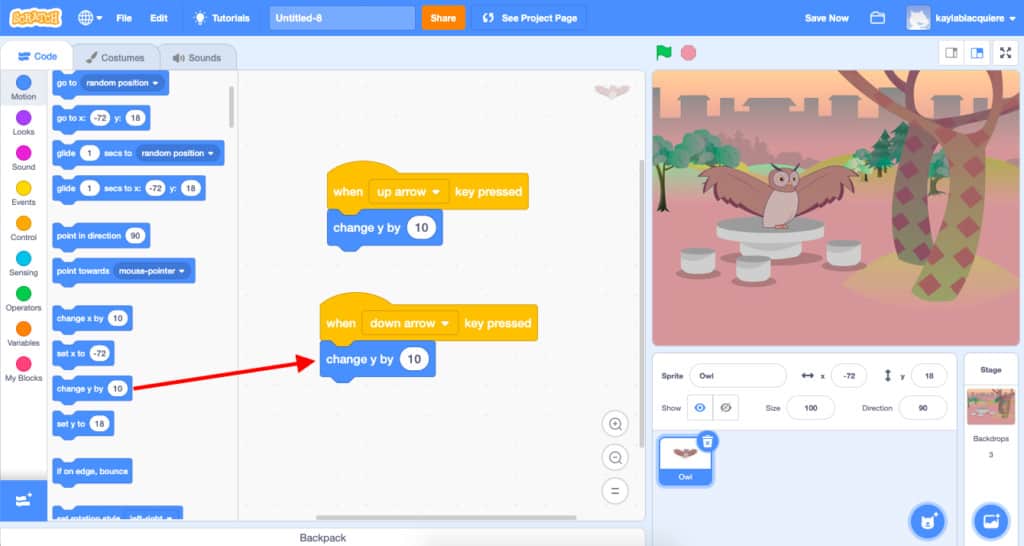
- Click and drag a “change y by 10” block from the Motion category in the Block Palette. Attach this block to the “when down arrow key pressed” block.
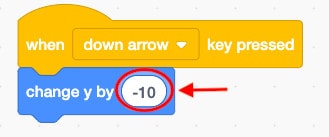
- Click on the white bubble inside the “change y by 10” block and change this number to -10. This will tell your sprite to move down the y-axis because the number is getting smaller. Therefore when you press the down arrow key your sprite should move 10 places downward on the y-axis to a new y-coordinate.
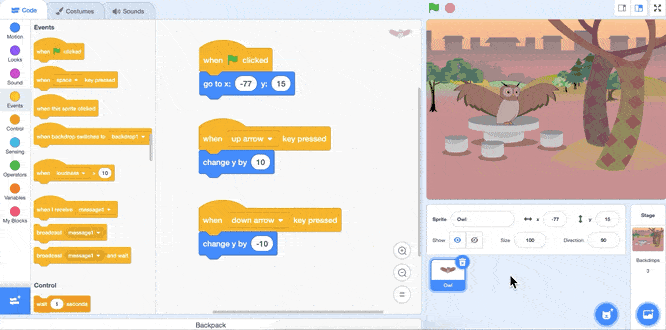
Your Code Area should now have three Event blocks with code under each block like the image below:
- Test your code! Start by pressing the green flag button at the top of your Stage to run your code. When you press the up or down arrow does your sprite move correctly along the y-axis to a new y-coordinate?
Conclusion
In this episode you learned basic Scratch concepts such as how to code a sprite to move up and down on the Stage. What will you create now that you have learned a few Scratch Basics?
We want to see the awesome things you’re creating! Take a photo or video and share your work with us by emailing media@pinnguaq.com or tagging @pinnguaq on Facebook, Twitter, or Instagram. Don’t forget to include the hashtag #LearnWithPinnguaq! You can also upload your project to the Pinnguaq Studio.
Resources
- Scratch Wiki
- Scratch Basics Episode 1: Introduction to the Scratch Working Environment
- Scratch Basics Episode 2: Deleting a Sprite, Adding a Sprite & Adding a Backdrop
- Scratch Basics Episode 3: Make Your Sprite Say Something
- Scratch Basics Episode 4: Adding Sound
- Scratch Basics Episode 5: Make Your Sprite Fly Around
- Scratch Basics Episode 6: Gliding From One Point to Another
- Scratch Basics Episode 7: Moving Right and Left
You might also like
Scratch Basics Episode 6: Gliding From One Point to Another
 Primary – Adult
In this series, the basics of Scratch will be introduced to provide learners with the foundational skills required to begin creating in Scratch.
Pixel Power: Sprites for Scratch
Middle – Adult
Create a basic four-frame walk cycle for a 32×32 character sprite from start to finish, then import that sprite into Scratch. A time-compressed video example of the process helps to illustrate the process.
Cyclic Bouncing Animations in Scratch
Middle – Grade 12
In this tutorial, you will learn about how conditional statements and a counter variable can be used to create a bouncing arrow animation in Scratch.
